In order to use enum enum enumerations in Q ++, you need to create a class inherited from QObject and register it as a QML Type before running the QML engine in the application.
To learn, create a project using QtQuick.
The minimum version of this class with enumerations will be as follows:
- #ifndef INFO_H
- #define INFO_H
- #include <QObject>
- class Info : public QObject
- {
- Q_OBJECT
- public:
- enum State {
- Information,
- Debug,
- Warning,
- Error
- };
- Q_ENUM(State)
- };
- #endif // INFO_H
Next, you need to register this class as a QML Type in the main function. This requires a QtQml header file and a qmlRegisterType function.
- #include <QGuiApplication>
- #include <QQmlApplicationEngine>
- #include <QtQml> // Include QtQml to use qmlRegisterType
- #include "info.h" // Connect the header file of the Info class
- int main(int argc, char *argv[])
- {
- QGuiApplication app(argc, argv);
- qmlRegisterType<Info>("info", 1, 0, "Info"); // Register this class as a module
- QQmlApplicationEngine engine;
- engine.load(QUrl(QStringLiteral("qrc:/main.qml")));
- if (engine.rootObjects().isEmpty())
- return -1;
- return app.exec();
- }
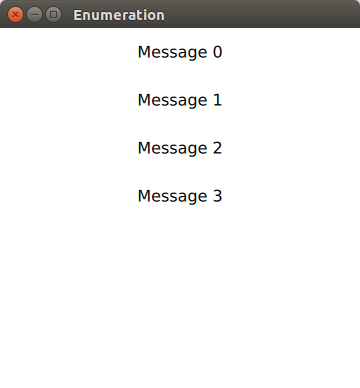
After that it will only be necessary to connect the new QML module in the main.qml file and use the enumerations to display the text. We will output the message "Message 0", "Message 1", etc. The numbers will be taken from the enumerations.
- import QtQuick 2.5
- import QtQuick.Window 2.2
- import QtQuick.Controls 1.4
- import info 1.0 // Import Module
- Window {
- visible: true
- width: 360
- height: 360
- title: qsTr("Enumeration")
- ListView {
- anchors.fill: parent
- delegate: Item {
- height: 48
- width: parent.width
- Text {
- anchors.fill: parent
- text: "Message " + model.text
- verticalAlignment: Text.AlignVCenter
- horizontalAlignment: Text.AlignHCenter
- }
- }
- model: ListModel {
- // Use the enumerations from C ++
- ListElement {text: Info.Information}
- ListElement {text: Info.Debug}
- ListElement {text: Info.Warning}
- ListElement {text: Info.Error}
- }
- }
- }
Appearance of the application will be as follows:

