The second social network through which you can authenticate on the site will be Google+.
I will not go into all the details of setting up and installing the Python Social Auth Django battery, as it was discussed in the previous article . But I note that this time the connection took only half an hour.
However, setting up access through the Google API was more complex than for VKontakte.
settings.py
First, you need to register a new backend, which will be responsible for authenticating via Google+.
- AUTHENTICATION_BACKENDS = (
- ...
- 'social_core.backends.google.GoogleOAuth2',
- 'django.contrib.auth.backends.ModelBackend',
- )
Secondly, you need to write the variables for the API key and private key
- SOCIAL_AUTH_GOOGLE_OAUTH2_KEY = 'XXXXXXXX'
- SOCIAL_AUTH_GOOGLE_OAUTH2_SECRET = 'XXXXXXXXX'
Setting up the application in the Google API Console
And now we'll figure out how to configure the application in the Google API Console to gain the ability to authenticate users on the site through the Google+ social network.
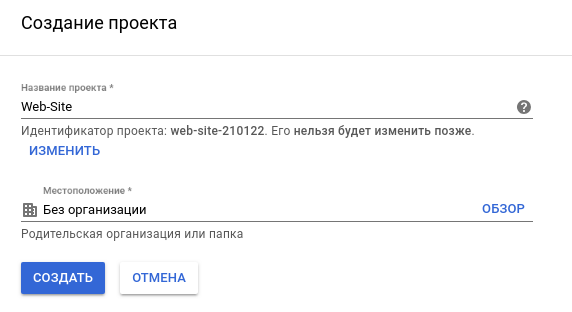
Step 1 - create a project
Step 2 - Enable the Google+ API
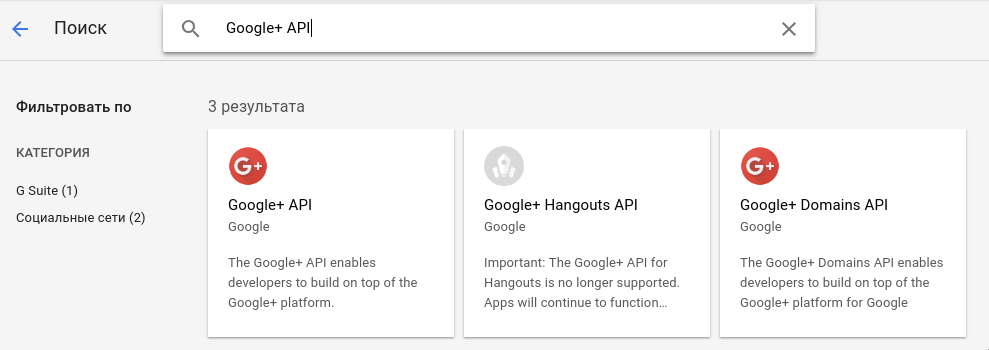
After your project is created, you need to connect the appropriate API, namely the Google+ API.
Go to the Enable API and Services section.

Find the Google+ API and enable it
Step 3 - Create a website application in your project
You need to go to the credentials section and select the OAuth customer ID item in the user credentials creation box.
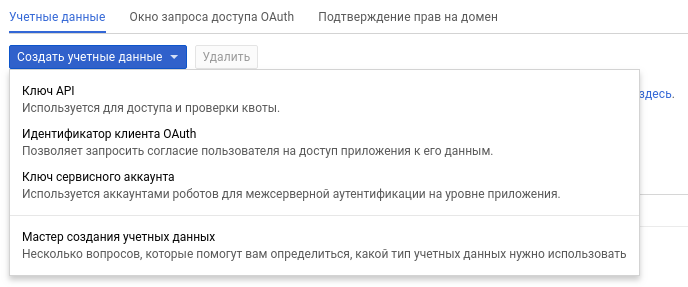
From the options offered, select the Web application.
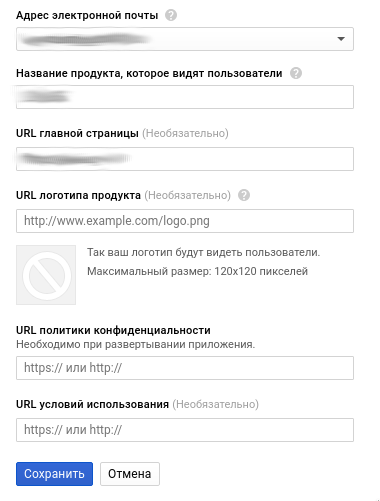
Step 4 - Configuring the Credential Query page
Here you will be asked to choose your email address. as a developer, you can add and some other.
Next is the name of the product.
And the URL of the main page of your site, the rest at will
Step 5 - Set up the app's access to the Google+ API
Unlike VKontakte, in the case of the Google+ API, it is controlled more thoroughly where the request comes from and where the user is redirected in case of successful authorization. Here lies one nuance of customization.
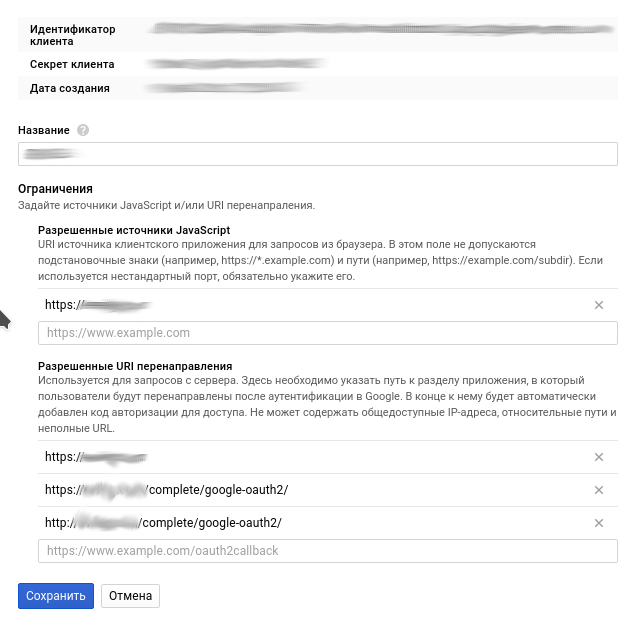
Here in these settings are the keys we need
- SOCIAL_AUTH_GOOGLE_OAUTH2_KEY = 'Идентификатор клиента'
- SOCIAL_AUTH_GOOGLE_OAUTH2_SECRET = 'Секрет клиента'
Then sources and redirects.
In the permitted sources you need to show the address of your site, for example
https://example.com
But the permissible URI redirection implies where the user should be redirected in case of successful authentication. And here you need to consider how you have connected the social authentication module on the site. In my case, it is connected to the root of the site, so you get this address
http://example.com/complete/google-oauth2/
If this is not set, then authentication will not work properly, because the Google+ API will not allow the user to successfully navigate to your site with authentication data.
Template
In the template, you can add this code to get the icon from the authorization url
- <a href="{% url 'social:begin' 'google-oauth2' %}"><img src="/static/lgoogle.png" class="avatar-3" data-toggle="tooltip" title="{% trans 'Login via Google+' %}"></a>
Authenticating a user from different social networks
It may also be a problem to determine a user if he is logged into an account on the site using different social networks, for example, today he came through VKontakte, and tomorrow he will use Google+.
Then, so that several accounts of the same user do not appear, you need to check the information about the user who is authenticated with the help of the social network, and if he already visited the site with the help of another social network earlier, then link his authentication with the earlier created account.
This check is included in Python Social Auth Django in one setting.
- SOCIAL_AUTH_PIPELINE = (
- 'social_core.pipeline.social_auth.associate_by_email',
- )
In this case, information about the user's email is used
For Django I recommend VDS-hosting TIMEWEB

Какую ссылку в гулге юзать для редиректа oauth2?