Qualitative layout always increases application usability, and this is true for all kinds of applications, from desktop to mobile. One such interface elements, which can improve usability is QSplitter class, which is an object-type layout with a movable divider that separates the two areas in the application interface.
Project Structure for QSplitter
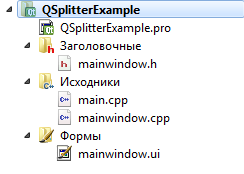
Project Structure for QSplitter Project structure completely unremarkable and a little interesting, since the main actions will be carried out in the designer, and QSplitter in mainwindow.cpp setting will produce a minimum.
Step by step with QSplitter
The first step - First add the two types of layout objects, which will be located elements of the interface
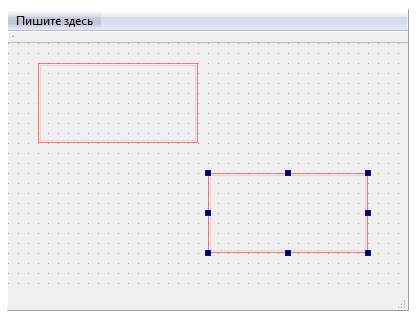
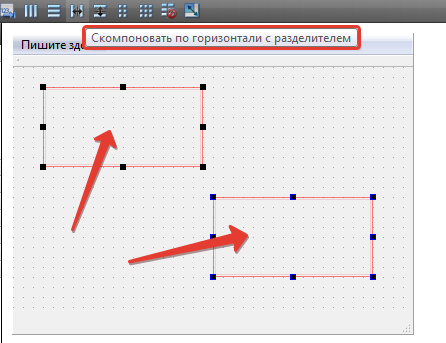
Adiing two layouts The second step - Choose a layout, both holding the Ctrl key and click on the button "Lay horizontally delimited", well, or "Lay vertically delimited", who despite what you need.
layout with QSplitter The third step - Stretch the area in which is located our QSplitter. This is necessary if the appearance of your QSplitter behaved not as you would have liked. To do this, select the parent widget, which is your QSplitter and click on the button "Lay on the grid." As a result, we obtain a result similar to the figure below.
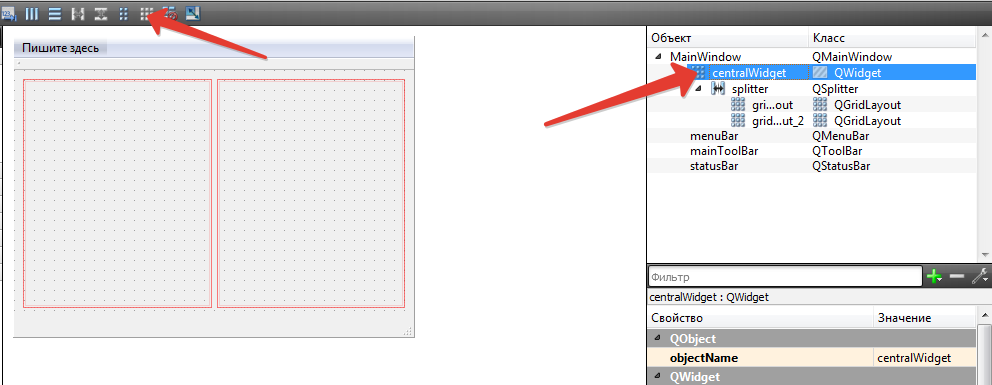
Stretch the area with QSplitter The fourth step - we distribute multiple objects for clarity.
The fifth step - Correct the code to adjust the tension areas when you run the application and set the color separator.
#include "mainwindow.h"
#include "ui_mainwindow.h"

MainWindow::MainWindow(QWidget *parent) :
    QMainWindow(parent),
    ui(new Ui::MainWindow)
{
    ui->setupUi(this);

    /* We set the parameters of areas stretching.
     * Areas considered from left to right.
     * The method setStretchFactor first set index field, and then her weight.
     * Thus the first region set maximum weight and the second region is minimal.
     * */
    ui->splitter->setStretchFactor(0,1);
    ui->splitter->setStretchFactor(1,0);

    /* Also, just I want to show you how to choose the color separator.
     * To do this we need to use a class QPallete, for which you choose the background color.
     * */
    QPalette p;
    p.setColor(QPalette::Background, Qt::red);
    /* And sets the palette QSplitter
     * */
    ui->splitter->setPalette(p);
}

MainWindow::~MainWindow()
{
    delete ui;
}
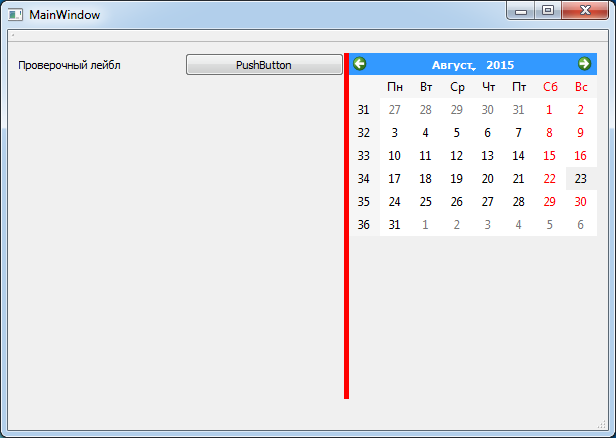
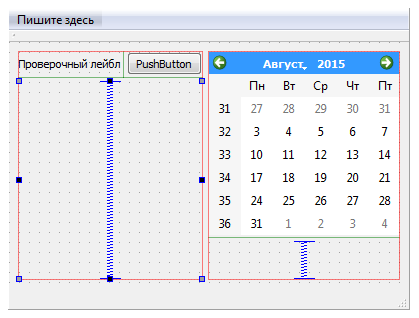
Result