- 1. Register reCAPTCHA
- 2. Implementation
- 1. Install EVILEG-CORE
- 2. settings.py
- 3. urls.py
- 4. views.py
- 5. Client side
- 3. Result
This will be the first article on the use of a set of established utilities that are present in the core of the EVILEG site. This part of the site’s program code is in open source, so I want to talk about what functionality is present in this battery and how to use it.
I'll start by using Google reCAPTCHA , and what is required to quickly implement this functionality.
Register reCAPTCHA
The first step is to register the site in the admin reCAPTCHA .

Implementation
Adding Google reCAPTCHA will consist of two steps:
- Implementing reCAPTCHA on the client side, i.e. in HTML code
- Внедрение reCAPTCHA на серверной стороне
When registering a site, two keys will be generated:
- Site key - The key to be placed on the HTML page
- Secret key - The key that will be used to communicate the site and the Google service reCAPTCHA
The implementation process will be as follows. On the HTML page in a form that requires validation of user actions, place the reCAPTCHA script and the site key.
On the server side, we add a decorator to the request method for Class Based View.
Install EVILEG-CORE
- pip install evileg-core
Also evileg_core will pull up all the dependencies necessary for this package. Including the requests library, which is used to execute the captcha verification request.
settings.py
Add evileg_core to installed applications
- INSTALLED_APPS = [
- ...
- 'evileg_core',
- ]
We also add reCAPTCHA Secret Key and Site Key.
- GOOGLE_RECAPTCHA_SECRET_KEY = 'XXXXXXXXXXXXXXXXXXXXXXXXXXXXXXXXXXXXXXXX'
- GOOGLE_RECAPTCHA_SITE_KEY = 'XXXXXXXXXXXXXXXXXXXXXXXXXXXXXXXXXXXXXXXX'
urls.py
We wrap the necessary view with the decorator
- # -*- coding: utf-8 -*-
- from django.conf.urls import url
- from evileg_core.decorators import recaptcha
- from . import views
- app_name = 'registration'
- urlpatterns = [
- path('register/', recaptcha(views.RegisterView.as_view()), name='register'),
- ]
views.py
And in the view itself, we check the validity of reCAPTCHA. In my case, this was a view inherited from the FormView class.
- class RegisterView(FormView):
- form_class = UserCreationForm
- template_name = 'register.html'
- def form_valid(self, form):
- # reCAPTCHA validation check
- if self.request.recaptcha_is_valid:
- form.save()
- return render(self.request, 'register_success.html', self.get_context_data())
- return render(self.request, 'register.html', self.get_context_data())
Client side
On the client side, you need to add the script connection code, the location of the captcha, as well as the output of error messages.
- {% extends 'home/base.html' %}
- {% block content %}
- <form action="{% url 'registration:register' %}" method="post">
- {% csrf_token %}
- {{ form.as_p }}
- {% load recaptcha from evileg_core %}
- {% recaptcha 'form-group' %}
- {% if messages %}
- {% for message in messages %}
- {{ message }}
- {% endfor %}
- {% endif %}
- <input type="submit" value="Register">
- </form>
- {% endblock %}
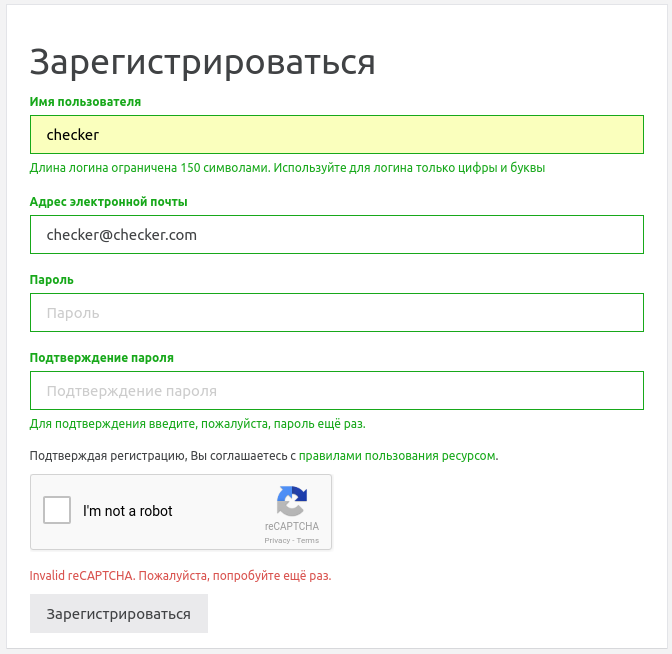
Result
As a result, we get a fairly simple implementation of reCAPTCHA on the Django site.
For Django I recommend Timeweb Hosting VDS Server .
