Read and write operations to file are standard functionality of any applications that are logging the events, work with files, up to the transfer of data over the network. In this article, we consider methods of recording information in the files, and read from a file recorded line.
Project structure
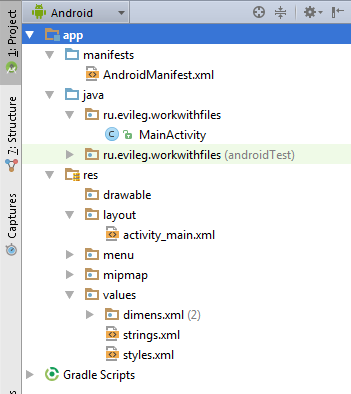
Esthetic changes to the standard buttons or ListView will not be made in this lesson, since we work with what is hidden from the eyes of the user, namely, to work with files.
The entire structure of the project respectively is at this time only one class: MainActivity
Also, the project contains the following resource files:
- activity_main.xml
- strings.xml
- styles.xml - in the file does not have any changes relating to a project.
In addition, changes in the AndroidManifest.xml file. The file you need to add the following two lines. This permits the application - perform read and write operations to an external storage (ie SD Card phone) in modern smartphones based on the Android operating system in the majority of cases, the recording of information is carried out in an external drive, though typical user finds the drive internal, because it is built, but in terms of operating systems, this drive (ie SD Card) is an external drive. This article will not be considered an option to work with a true inner drive.
- <manifest xmlns:android="http://schemas.android.com/apk/res/android"
- package="ru.evileg.workwithfiles" >
- <uses-permission android:name="android.permission.WRITE_EXTERNAL_STORAGE" />
- <uses-permission android:name="android.permission.READ_EXTERNAL_STORAGE" />
- ...
- </manifest>
Formation apps layout
activity_main.xml
Layout main Activiti, which will be the work of our application. This markup is present only two buttons (Button) and a text box (TextView), in which we will display information stored in the file.
- <LinearLayout xmlns:android="http://schemas.android.com/apk/res/android"
- xmlns:tools="http://schemas.android.com/tools" android:layout_width="match_parent"
- android:layout_height="match_parent"
- android:paddingLeft="@dimen/activity_horizontal_margin"
- android:paddingRight="@dimen/activity_horizontal_margin"
- android:paddingTop="@dimen/activity_vertical_margin"
- android:paddingBottom="@dimen/activity_vertical_margin"
- android:background="#ffffff"
- android:orientation="vertical"
- tools:context=".MainActivity">
- <Button
- android:layout_width="match_parent"
- android:layout_height="wrap_content"
- android:text="@string/write_file"
- android:id="@+id/buttonWrite"
- android:layout_gravity="center_horizontal" />
- <Button
- android:layout_width="match_parent"
- android:layout_height="wrap_content"
- android:text="@string/read_file"
- android:id="@+id/buttonRead"
- android:layout_gravity="center_horizontal" />
- <TextView
- android:layout_width="match_parent"
- android:layout_height="match_parent"
- android:id="@+id/textView"
- android:textSize="26sp"
- android:layout_gravity="center_horizontal" />
- </LinearLayout>
strings.xml
The resource file text in the Android OS. Preparation of all the lines that are used in your application in the file, is not only a good habit, but a prerequisite for the development of high-quality applications. Because, if you discipline yourself to keep all such information in the file, then it will pay off later when you will make the translation into other languages. Especially because in Android Studio has convenient features for this.
- <resources>
- <string name="app_name">Work With Files</string>
- <string name="hello_world">Hello world!</string>
- <string name="action_settings">Settings</string>
- <string name="write_done">Запись выполнена</string>
- <string name="write_file">Записать данные в файл</string>
- <string name="read_file">Считать данные из файла</string>
- </resources>
styles.xml
In this file, there are no changes related to the project. But when you create a standard project design theme is not rendered Android Studio. Issued error in preview mode and in design. To avoid this, list the following information instead of the old.
- <resources>
- <!-- Base application theme. -->
- <style name="AppTheme" parent="Base.Theme.AppCompat.Light"/>
- </resources>
The main project class - MainActivity.java
Today this class is concentrated the whole program code. In this class, made the formation of the appearance of the main Activiti and organized work with files.
- package ru.evileg.workwithfiles;
- import android.os.Bundle;
- import android.os.Environment;
- import android.support.v7.app.AppCompatActivity;
- import android.view.Menu;
- import android.view.MenuItem;
- import android.view.View;
- import android.widget.Button;
- import android.widget.TextView;
- import android.widget.Toast;
- import java.io.BufferedReader;
- import java.io.File;
- import java.io.FileInputStream;
- import java.io.FileNotFoundException;
- import java.io.FileOutputStream;
- import java.io.IOException;
- import java.io.InputStreamReader;
- public class MainActivity extends AppCompatActivity implements View.OnClickListener {
- /*
- * Create a permanent constants for convenience, to declare the TextView,
- * which should be available in several class methods
- */
- private static final String fileName = "hello.txt";
- private static final String text = "Hello World";
- private static TextView textView;
- @Override
- protected void onCreate(Bundle savedInstanceState) {
- super.onCreate(savedInstanceState);
- setContentView(R.layout.activity_main);
- /*
- * We declare and initialize Buttons,
- * and initialize the TextView
- * Also in the Activiti implement the method of pressing the event listener,
- * ie OnClickListener, which attaches itself to the buttons
- */
- textView = (TextView) this.findViewById(R.id.textView);
- Button buttonWrite = (Button) this.findViewById(R.id.buttonWrite);
- Button buttonRead = (Button) this.findViewById(R.id.buttonRead);
- buttonWrite.setOnClickListener(this);
- buttonRead.setOnClickListener(this);
- }
- @Override
- public boolean onCreateOptionsMenu(Menu menu) {
- // Inflate the menu; this adds items to the action bar if it is present.
- getMenuInflater().inflate(R.menu.menu_main, menu);
- return true;
- }
- @Override
- public boolean onOptionsItemSelected(MenuItem item) {
- // Handle action bar item clicks here. The action bar will
- // automatically handle clicks on the Home/Up button, so long
- // as you specify a parent activity in AndroidManifest.xml.
- int id = item.getItemId();
- //noinspection SimplifiableIfStatement
- if (id == R.id.action_settings) {
- return true;
- }
- return super.onOptionsItemSelected(item);
- }
- /*
- * Processor keystrokes. When the button is defined by its ID through getID () method
- */
- @Override
- public void onClick(View v) {
- switch (v.getId()){
- case R.id.buttonWrite:
- writeFile();
- break;
- case R.id.buttonRead:
- readFile();
- break;
- default:
- break;
- }
- }
- private void writeFile() {
- try {
- /*
- * Create a file object, and the path to be the method of transfer class Environment
- * Contacting goes as stated above to an external drive
- */
- File myFile = new File(Environment.getExternalStorageDirectory().toString() + "/" + fileName);
- myFile.createNewFile(); // It creates the file if it has not been created
- FileOutputStream outputStream = new FileOutputStream(myFile); // Then create a stream for writing
- outputStream.write(text.getBytes()); // and produce directly record
- outputStream.close();
- /*
- * Call Toast messages are not related to the topic.
- * Just for the convenience of the visual inspection method of execution in the annex
- */
- Toast.makeText(this, R.string.write_done, Toast.LENGTH_SHORT).show();
- } catch (Exception e) {
- e.printStackTrace();
- }
- }
- private void readFile() {
- /*
- * Similarly, the file object is created
- */
- File myFile = new File(Environment.getExternalStorageDirectory().toString() + "/" + fileName);
- try {
- FileInputStream inputStream = new FileInputStream(myFile);
- /*
- * Buffer data from the input file stream
- */
- BufferedReader bufferedReader = new BufferedReader(new InputStreamReader(inputStream));
- /*
- * Class to create strings from character sequences
- */
- StringBuilder stringBuilder = new StringBuilder();
- String line;
- try {
- /*
- * We produce by-line reading of data from a file into a string constructor
- * After the data is finished, we produce the output text in the TextView
- */
- while ((line = bufferedReader.readLine()) != null){
- stringBuilder.append(line);
- }
- textView.setText(stringBuilder);
- } catch (IOException e) {
- e.printStackTrace();
- }
- } catch (FileNotFoundException e) {
- e.printStackTrace();
- }
- }
- }
Result
If in the process of studying the material did not have any problems and errors, by pressing the record button in the file will create a new file, and will be made "Hello World" string entry. When you click the button reading a saved information will be displayed in a text file. The process is shown in the screenshots below.
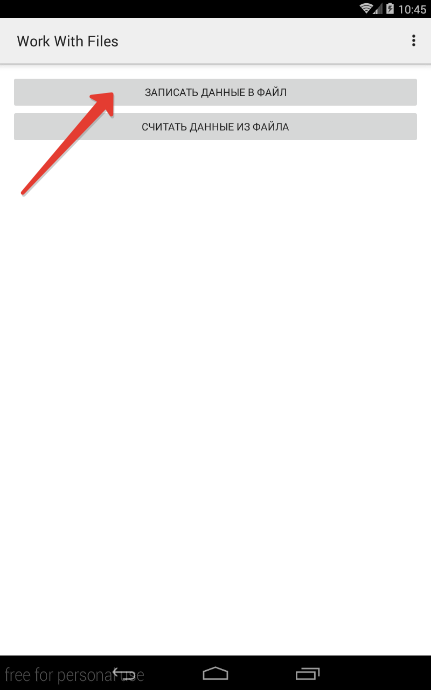
By pressing the button in the recording information file
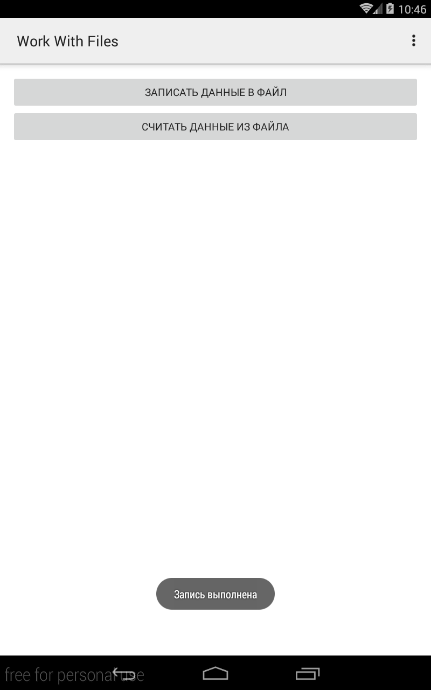
Filing
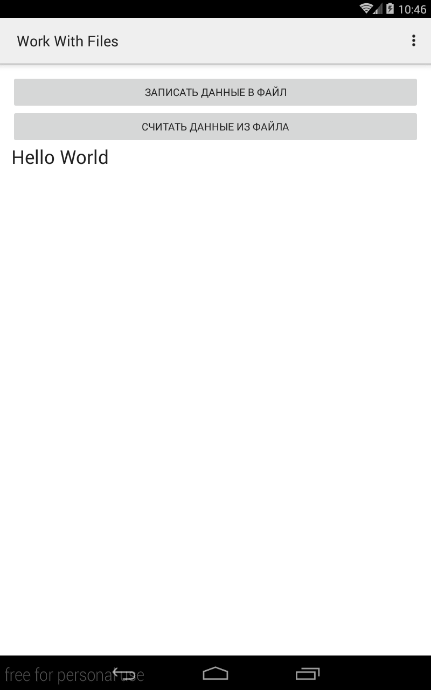
Reading from a file is done by pressing the corresponding button. This text is displayed in a TextView
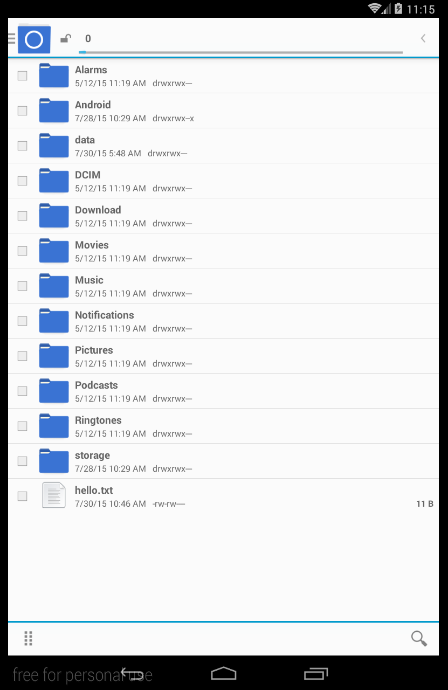
Created hello.txt file in the file manager

Как я понял данное приложение сохраняет текст в один единственный файл - hello.txt. Хотел бы узнать как можно реализовать функцию создания новый текстовых файлов и их переименования, т.е после нажатия на кнопку сохранения будет создаваться новый текстовый файл, пользователь будет выбирать куда не телефоне его сохранить и сам же вводит имя файла. А так же как реализовать функцию выбора из каталога файлов, т. е при нажатие на кнопку "считать из файла" открывалась бы папка в которой у пользователя находятся другие текстовые документы и он мог их редактировать последующего редактирования.
эххх... как это было давно и не правда )))) я с тех пор (через пару месяцев после этой статьи +-) на Java и не писал больше.
Вот если меня накроет не по-детски и я всё-таки начну писать сравнительные статьи Android: Java vs Qt , вот тогда что-нибудь интересное и вывалится на эту тему. А так пока... даже не знаю, что Вам ответить.