I will begin a series of lessons on QML Android to customize a button, or better to say with styling, as in this case the term is more appropriate. We will not invoke the dialog boxes in this tutorial, but just do your QML Cutom Button , which will change color when you click on it. And there will be two for clarity, these buttons.
The first button will be red with a black border and black text, and when pressed, it will change the background color to black with red border and red text. The second button will have the same colors, but in the opposite sequence.
Project structure of QML Custom Button
The project is created in QtCreator as the application project with Qt Quick Quick Controls elements. In fact, there already is menyubar, multiple conversations and a couple of buttons. So, throw out all but two buttons and go to customize them.
And the structure of the project, in this case get the following:
- QMLCutomButton.pro - project profile;
- deployment.pri - deployment profile;
- main.cpp - source file with main function;
- qml.qrc - resource file for images, qml files and so on;
- main.qml - main qml file;
- MainForm.ui.qml - resource qml file for using with qml designer
QMLCustomButton.pro
- TEMPLATE = app
- QT += qml quick widgets
- SOURCES += main.cpp
- RESOURCES += qml.qrc
- # Additional import path used to resolve QML modules in Qt Creator's code model
- QML_IMPORT_PATH =
- # Default rules for deployment.
- include(deployment.pri)
deployment.pri
- unix:!android {
- isEmpty(target.path) {
- qnx {
- target.path = /tmp/$${TARGET}/bin
- } else {
- target.path = /opt/$${TARGET}/bin
- }
- export(target.path)
- }
- INSTALLS += target
- }
- export(INSTALLS)
main.cpp
In thie file you have to create QML engine and load main.qml file.
- #include <QApplication>
- #include <QQmlApplicationEngine>
- int main(int argc, char *argv[])
- {
- QApplication app(argc, argv);
- QQmlApplicationEngine engine; // Create qml engine
- // And load main.qml file
- engine.load(QUrl(QStringLiteral("qrc:/main.qml")));
- return app.exec();
- }
MainForm.ui.qml
QtCreator warns that the file can only be edited in the designer, but in fact it is not. But we will not edit it manually.
- import QtQuick 2.5
- import QtQuick.Controls 1.4
- import QtQuick.Layouts 1.2
- Item {
- width: 640
- height: 480
- // Specify the name of the button to access them
- property alias button1: button1
- property alias button2: button2
- // Layer with buttons
- RowLayout {
- anchors.centerIn: parent
- // The first button
- Button {
- id: button1
- }
- // The second button
- Button {
- id: button2
- }
- }
- }
main.qml
And now look the logic operation buttons, which was described at the beginning of this article. For styling buttons used setting style, which defines ButtonStyle. The Body of Custom Button is a rectangle Rectangle, acting as the background of a button. For this Rectangle we will set the color and stroke with rounded corners. And to customize the text, you must override the Button Style button label, specifying the text color.
Note also that the color designation is made through a conditional expression by checking the object control, which points to the widget, ie the button that controls the style. If this control is pressed, the color of one another otherwise.
- import QtQuick 2.5
- import QtQuick.Controls 1.4
- import QtQuick.Controls.Styles 1.4
- ApplicationWindow {
- visible: true
- width: 640
- height: 480
- title: qsTr("Hello World")
- MainForm {
- // Stretch the object of the main window over the parent element
- anchors.fill: parent
- // Styling the first button
- button1.style: ButtonStyle {
- // Styling the appearance of button
- background: Rectangle {
- /* If the button is pressed, it will be red
- * with black border with rounded edges,
- * otherwise, it will be black with a red border
- */
- color: control.pressed ? "red" : "black"
- border.color: control.pressed ? "black" : "red"
- border.width: 2
- radius: 5
- }
- // Styling the button text color
- label: Text {
- /* If the button is pressed, the color will be black
- * otherwise red
- */
- text: qsTr("Press Me 1")
- color: control.pressed ? "black" : "red"
- }
- }
- // Styling second button
- button2.style: ButtonStyle {
- // Styling the appearance of button
- background: Rectangle {
- color: control.pressed ? "black" : "red"
- border.color: control.pressed ? "red" : "black"
- border.width: 2
- radius: 5
- }
- // Styling button color
- label: Text {
- text: qsTr("Press Me 2")
- color: control.pressed ? "red" : "black"
- }
- }
- }
- }
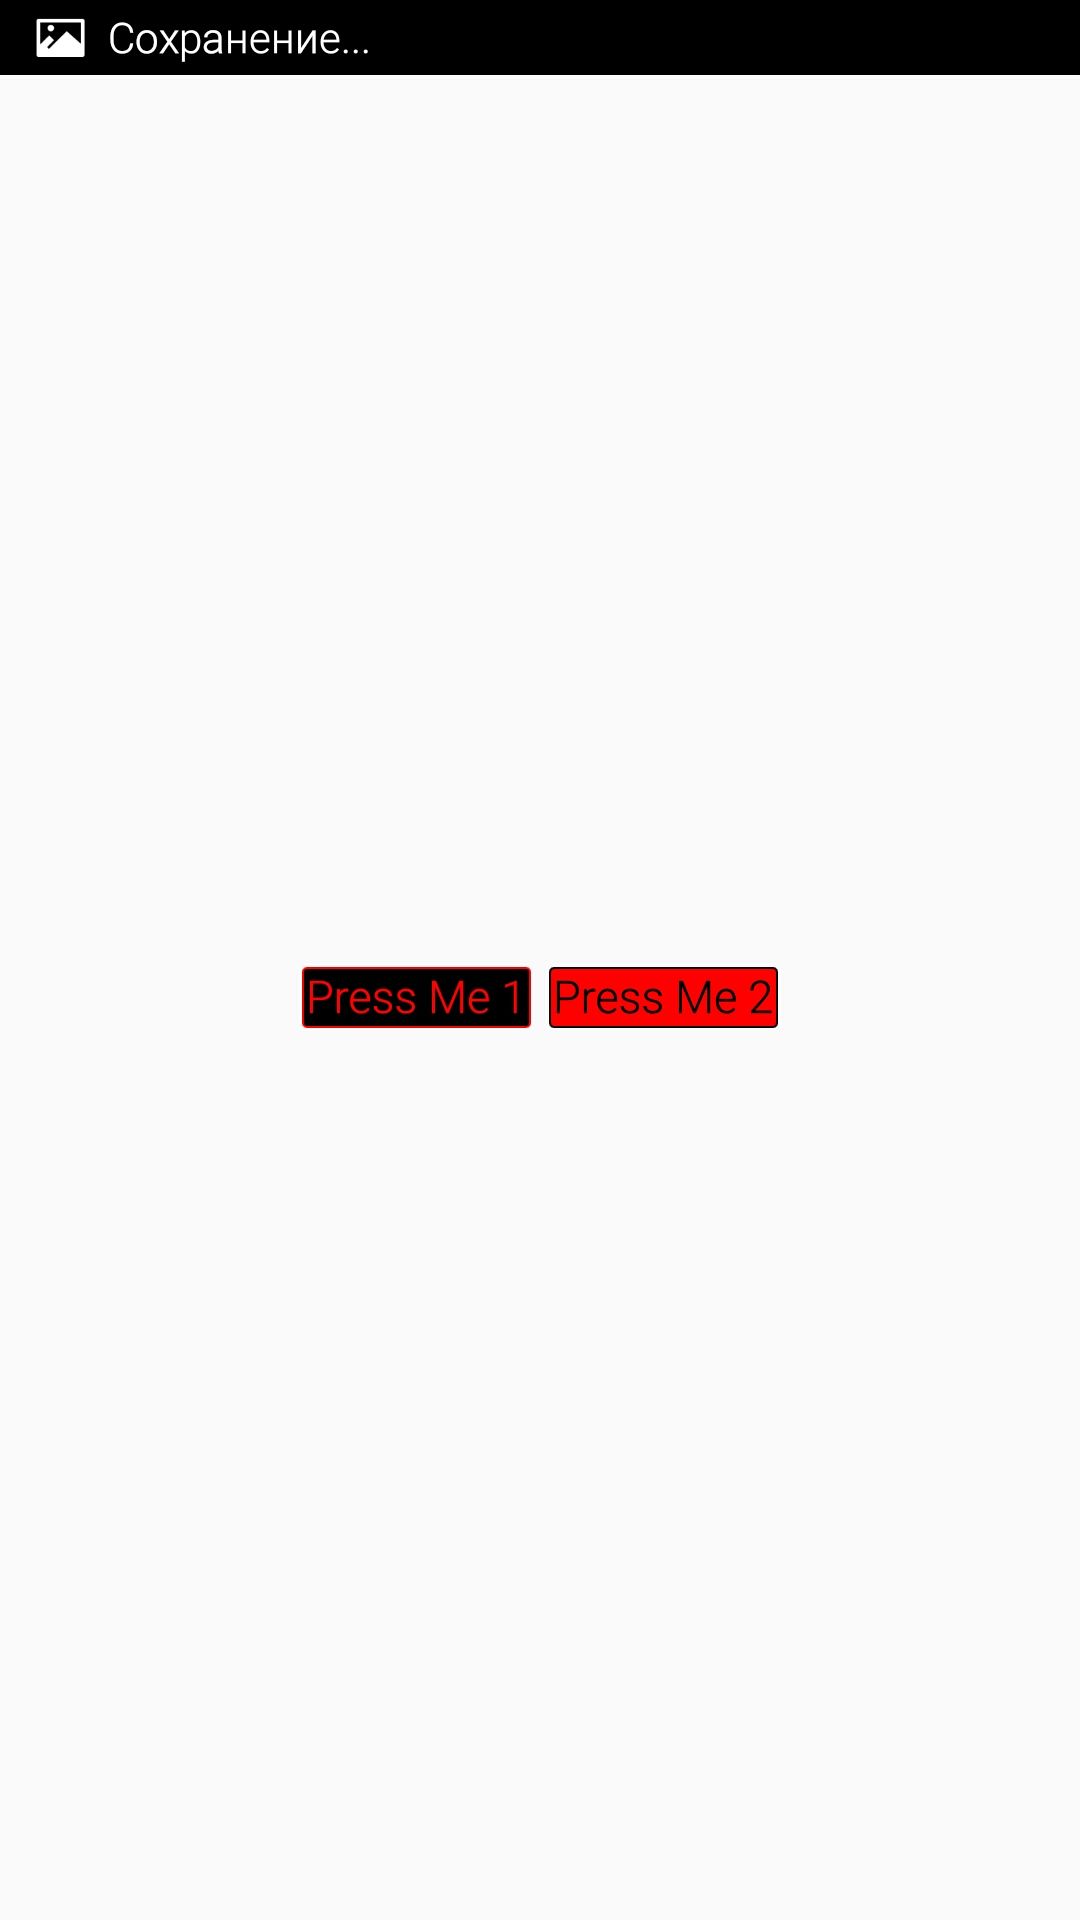
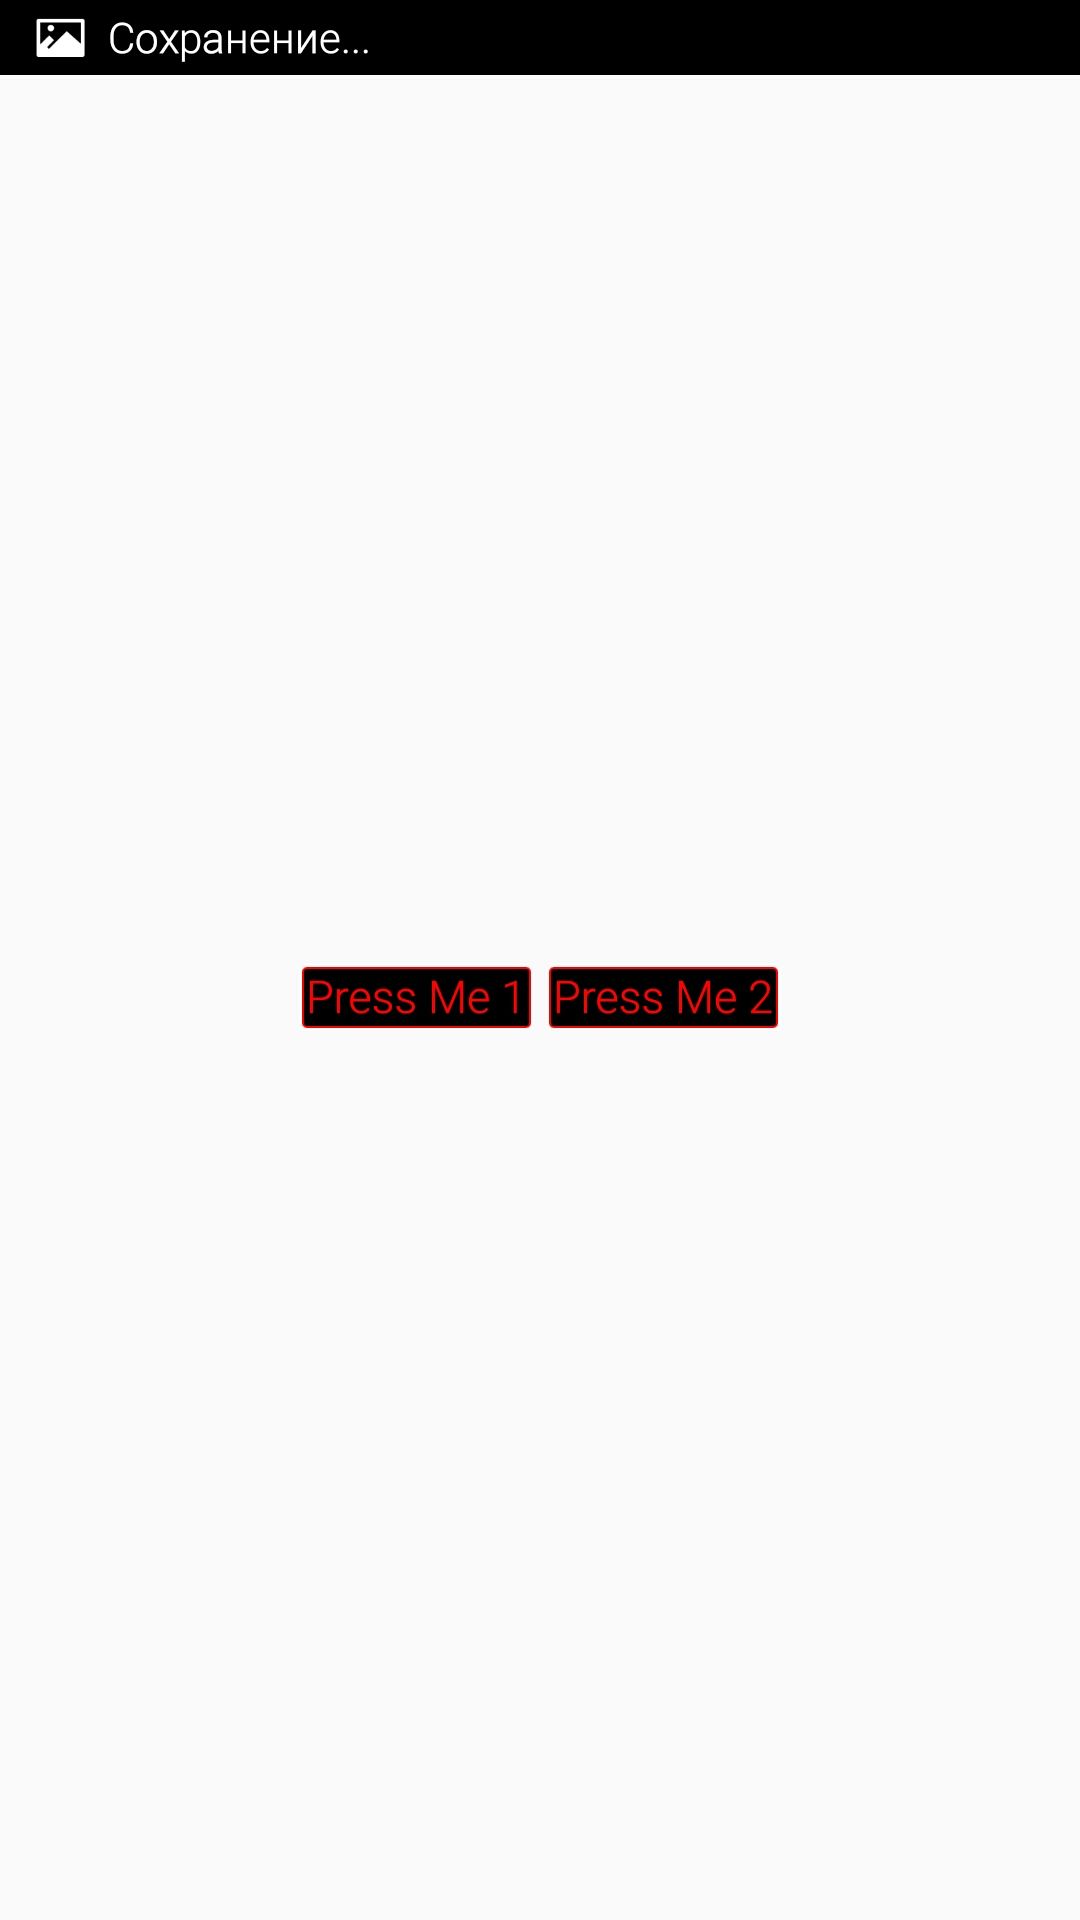
Result
Definitely, I am pleased that it is possible without any emulators and installation on Android Device to see the result of this work, and it is very inspiring. Yes, cross-platform and can not but rejoice.
And the appearance of the resulting keys will be such as shown below for screenshots and desktop with Meizu M1 Note smartphone. Also, look at the application logic can work in a video tutorial that comes after screenshots.

QML Custom Button on Desktop
QML Custom Button on Android
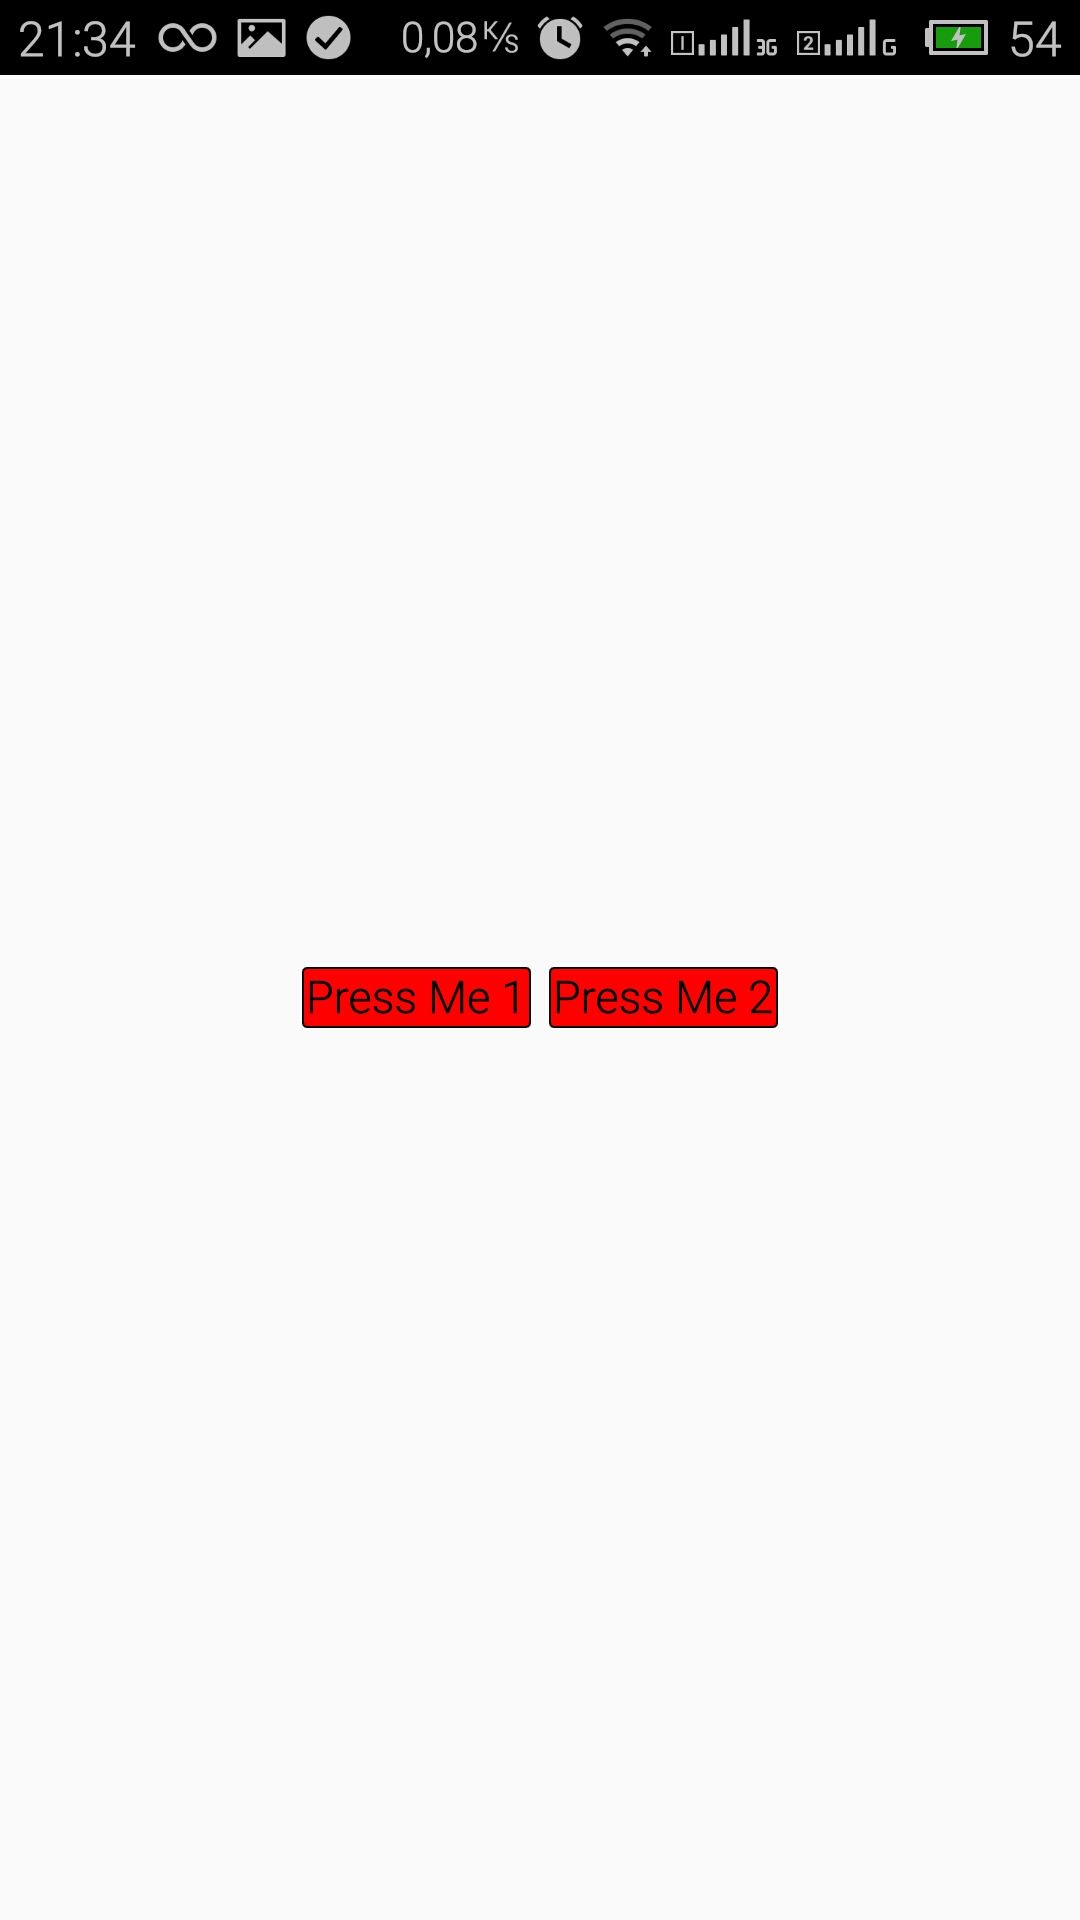
QML Custom Button on Android - pressed left button
QML Custom Button on Android pressed right button

А как кастомайзить Button если использовать QtQuick.Controls 2.0 ? В этом случае пишет Cannot assign to non-existent property "style"
Нашел
http://doc.qt.io/Qt-5/qtquickcontrols2-customize.html#customizing-button
Делаю вроде правильно, а ничего не получается. Что упустил? После button1. в выпадающем списке нет style.
Да, и откуда в уроке взялся файл .pri и зачем он нужен?
Добрый день. Этот урок для Qt Quick Control версии 1, Вы используете вторую версию. Здесь style уже нет, кастомизацию можно делать уже или черещ соответствующие property или через contentItem , или через делегаты, в зависимости от типа кастомизируемого объекта. Нужно отталкиваться от документации на конкретный объект
Добрый день. Не могу найти ссылки на скачивание проекта.
Добрый день. Её здесь нет.
Будьте добры, выложите проект-пример. QT быстро эволюционирует, сейчас уже 5.13 версия. В вашем проекте версия 5.5 и много отличий. Очень тормозится изучение.
Стараюсь ничего не обещать в этом направлении, ибо много основной работы и тем более, как вы и сказали - Qt очень быстро эволюционирует, но постараюсь обновить эту статью на выходных для Qt Quick 2
Как и обещал, вы можете посмотреть новую статью QML - Урок 037. Кастомизация кнопок в QML (Обновление урока 002) . Там же найдёте ссылку на Git репозиторий. Не забудьте поставить звёздочку репозиторию )))
А есть ли первый урок в серии QML ?