- 1. Build installer
- 1. Step one. Running the build script
- 2. Step Two. Defining the program data
- 3. Step Three. Setting a folder to install the application
- 4. Step Four. Selecting the folders and files that will be included in the package
- 5. Step Five. Setting advanced options of the installer
- 6. Step Six. Defining the license agreement
- 7. Step Seven. Set up the language of the installer
- 8. Step Eight. Setting the output folder and the name of the installer
- 9. Step Nine. Build installer
- 2. Coclusion
- 3. Video
In the previous article we learned how to quickly collect all used in the project DLL-libraries. And now it is time to talk about how to build an installer for OS Windows. For a long time I use quite comfortable opensource tool called InnoSetup, which allows just a few clicks to collect a multilingual installer.
The installer utility is going from a script, you can write to blows, or use a script to create the script. The second embodiment is sufficiently effective and easier.
Build installer
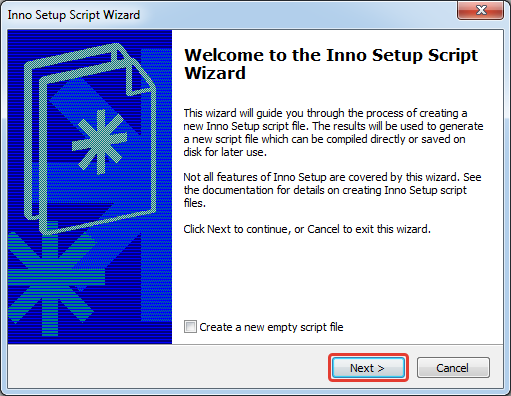
Step one. Running the build script
To run the script, go to the menu and choose to create a new one: File > New or combination of keys Ctrl + N.
Then click on the button Next.
Step Two. Defining the program data
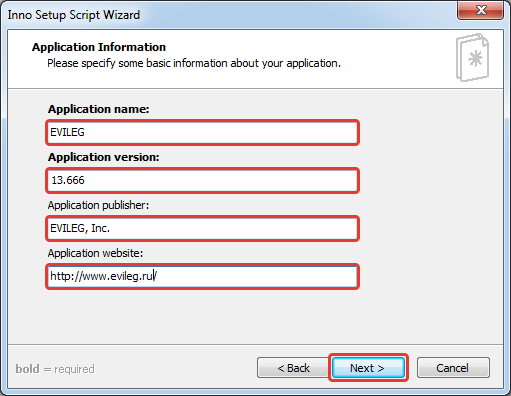
In this step, setting up your program's data:
- Application Name;
- The version of the application;
- Publisher application;
- Website application.
After that, follow the next (Next button).
Step Three. Setting a folder to install the application
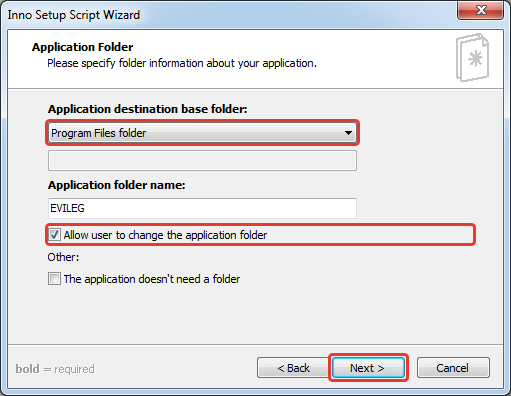
In this step, select the folder where you install the application, if required, and can specify whether to allow the user to change the destination folder or not.
Step Four. Selecting the folders and files that will be included in the package
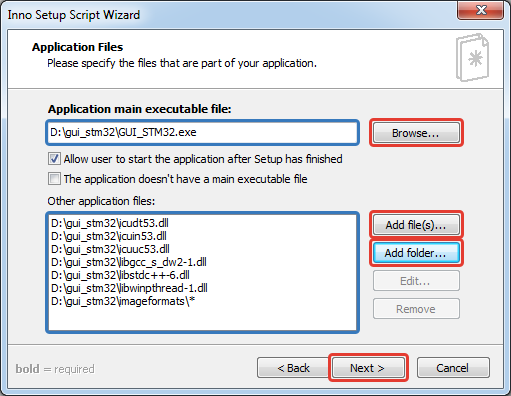
In this step, you must select the executable file (* .exe), folders, and your application libraries.
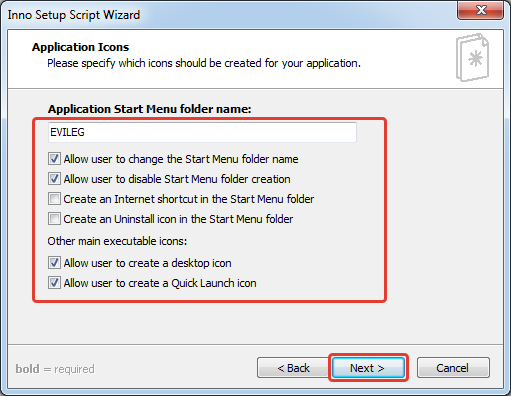
Step Five. Setting advanced options of the installer
In this step, we set up the icons that will be created when you install the application, and user rights to configure these icons during installation.
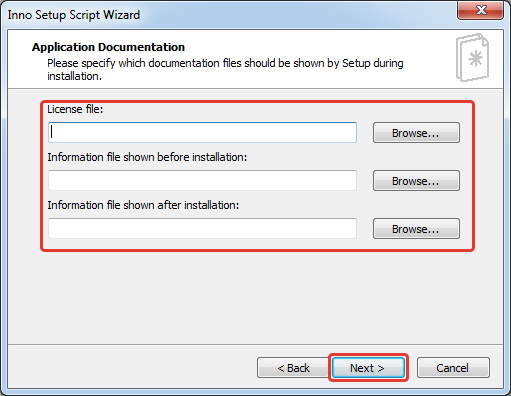
Step Six. Defining the license agreement
Unless of course you have time to write ...
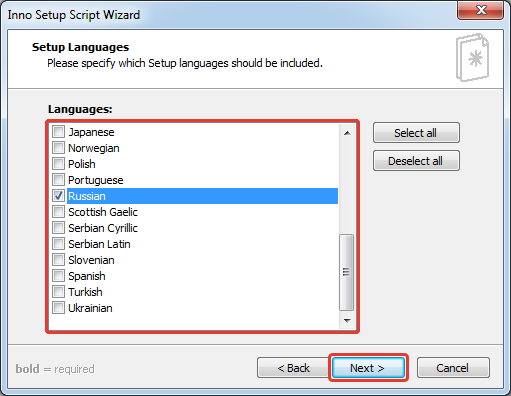
Step Seven. Set up the language of the installer
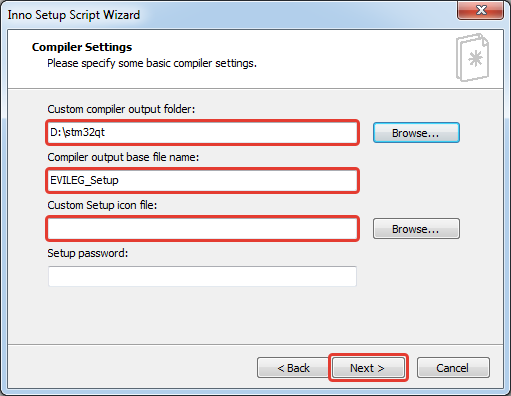
Step Eight. Setting the output folder and the name of the installer
In this step, we configure the path to the folder where the installer will be built and the name and icon of the installer. The following steps click Next and finally Finish .
Step Nine. Build installer
After the end of the script for the preparation of the script utility will offer to build the installer.
From build installer initially refused recommend if you have a folder with their attachments. As still need to manually register the file path of an assembly that are in those folders.
To do this, locate the unit [Files], and in it the line where the selected folder contents.
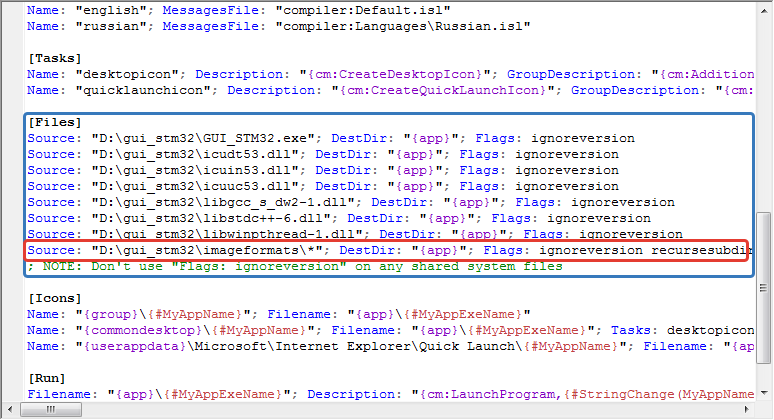
In this case, the line:
- Source: "D:\gui_stm32\imageformats\*"; DestDir: "{app}"; Flags: ignoreversion recursesubdirs createallsubdirs
It is necessary to correct the setting DestDir, as shown below, otherwise the installer will dump all the files in the pile.
- Source: "D:\gui_stm32\imageformats\*"; DestDir: "{app}\imageformats"; Flags: ignoreversion recursesubdirs createallsubdirs
Coclusion
Summing up, I can say that the utility copes with its functionality in the "Excellent"
And to download from the official website at the following link: InnoSetup
Just do not forget to collect all the DLL project in the same folder as was done in the previous article.

Можно ли как-то однозначно (не проверяя) выяснить, запустится ли программа в windows 7?
И как быть с разрядностью уже и просто в w10 (32\64)?
Здраствуйте. А как упаковать проект в deb пакет, для распространения на линуксе?