After we figured out how to create a menu in the Action Bar, add a context menu to any objects.
In this lesson, we'll add two text fields that will have a context menu.
-
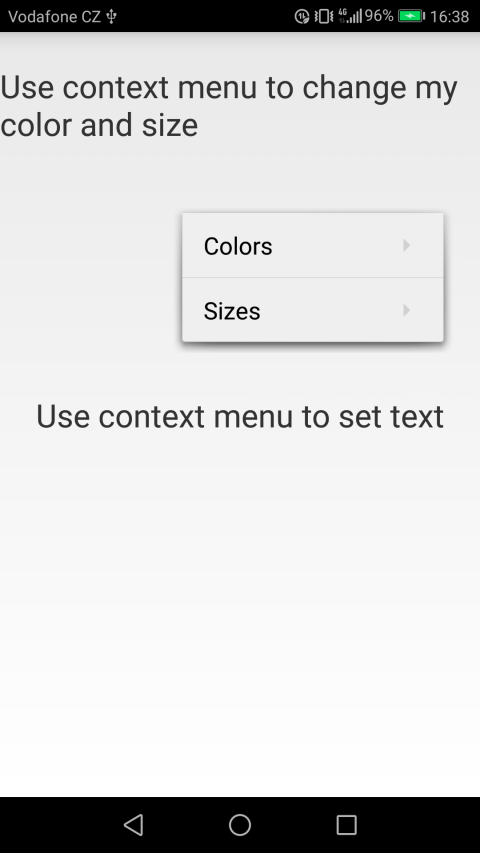
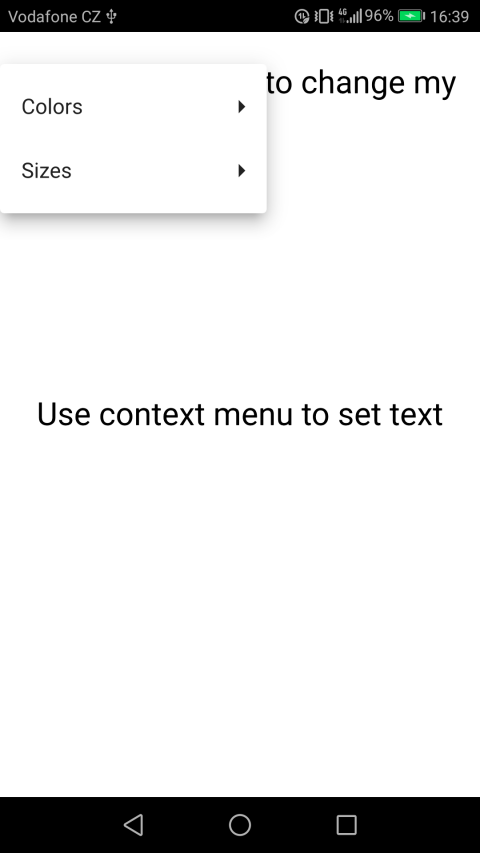
The context menu of the first text field will change the color and size of the text in the first text field
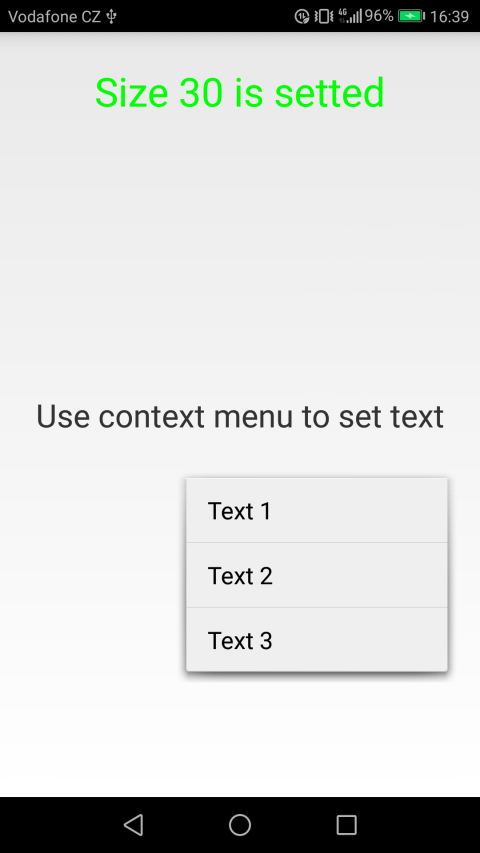
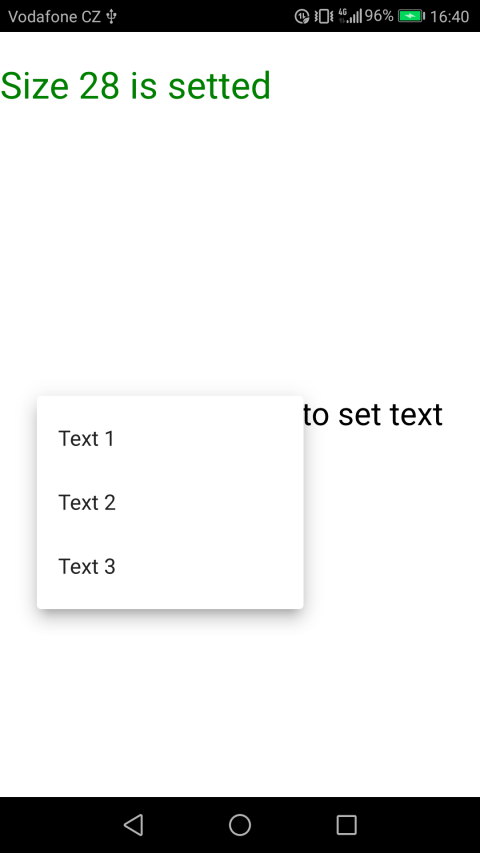
The context menu of the second text box will simply change the text in the second text field.
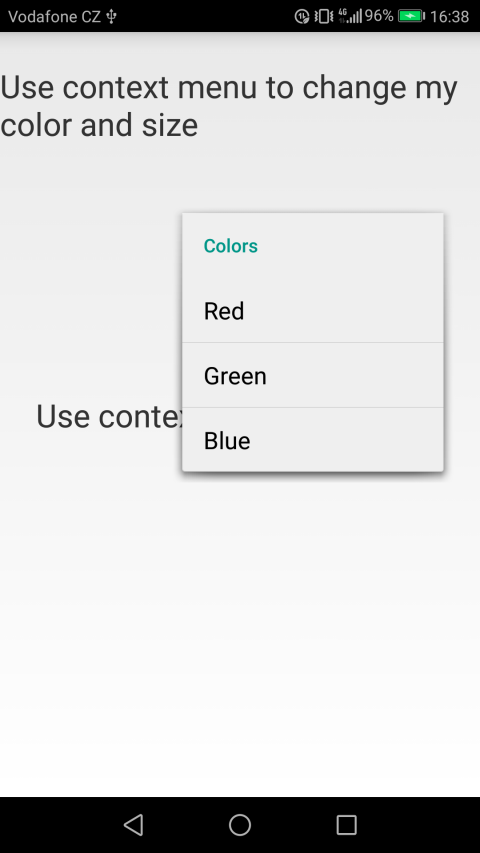
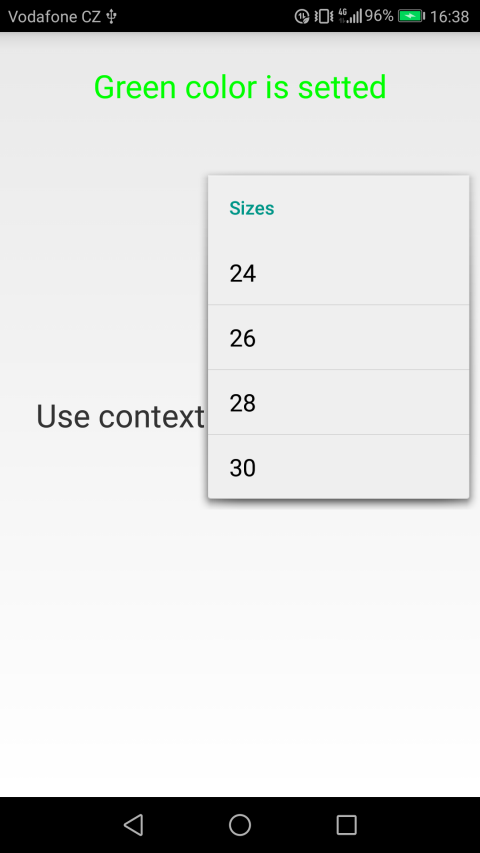
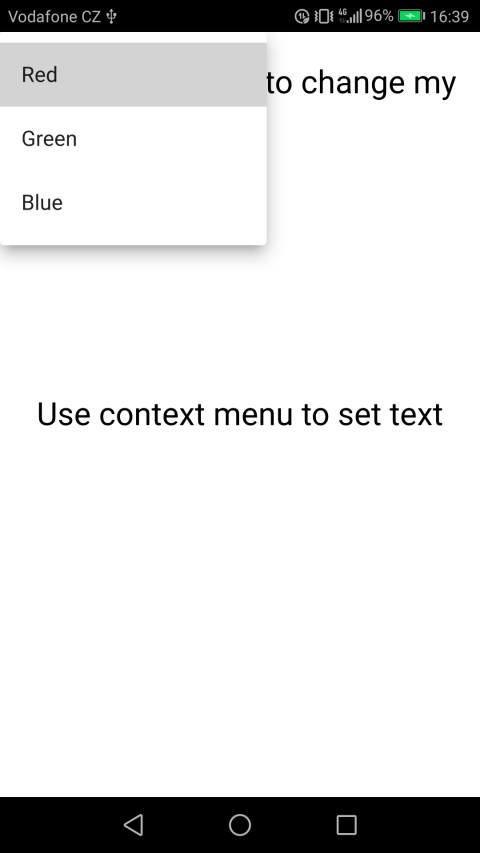
The first context menu will have two submenus, the first will be responsible for changing the color, and the second will be responsible for resizing.
ActionBar in Java Activity is disabled so that it does not interfere.
The appearance of context menus in Java
The appearance of context menus on Qt QML

Implementation in Java
activity_main.xml
In the Activity, create two text fields with id:
- firstTextView
- secondTextView
<?xml version="1.0" encoding="utf-8"?>
<android.support.constraint.ConstraintLayout xmlns:android="http://schemas.android.com/apk/res/android"
    xmlns:app="http://schemas.android.com/apk/res-auto"
    xmlns:tools="http://schemas.android.com/tools"
    android:layout_width="match_parent"
    android:layout_height="match_parent"
    tools:context="com.evileg.javacontextmenu.MainActivity">

    <TextView
        android:id="@+id/firstTextView"
        android:layout_width="wrap_content"
        android:layout_height="wrap_content"
        android:layout_marginTop="24dp"
        android:text="Use context menu to change my color and size"
        android:textSize="24sp"
        app:layout_constraintEnd_toEndOf="parent"
        app:layout_constraintHorizontal_bias="0.5"
        app:layout_constraintStart_toStartOf="parent"
        app:layout_constraintTop_toTopOf="parent" />

    <TextView
        android:id="@+id/secondTextView"
        android:layout_width="wrap_content"
        android:layout_height="wrap_content"
        android:text="Use context menu to set text"
        android:textSize="24sp"
        app:layout_constraintBottom_toBottomOf="parent"
        app:layout_constraintEnd_toEndOf="parent"
        app:layout_constraintHorizontal_bias="0.5"
        app:layout_constraintStart_toStartOf="parent"
        app:layout_constraintTop_toTopOf="parent" />

</android.support.constraint.ConstraintLayout>
MainActivity.java
The context menu in Java will be created using the onCreateContextMenu method.
This method is called each time before the context menu is called. In this method, the menu is populated with all the necessary menu items, depending on for which object this context menu is called.
The onCreateContextMenu method contains the following arguments:
- ContextMenu , in which menu items are added
- View - The screen element for which the context menu is called
- ContextMenu.ContextMenuInfo – contains additional information when a context menu is called for a list item
To process clicks on the menu items, the onContextItemSelected method will be used.
In order to determine how from the menu items was selected, we will need to designate specific id for each menu item, for this we use the variables indicated by the final attributes.
To register interface elements for processing the context menu, use the registerForContextMenu method.
package com.evileg.javacontextmenu;

import android.app.Activity;
import android.graphics.Color;
import android.os.Bundle;
import android.view.ContextMenu;
import android.view.MenuItem;
import android.view.SubMenu;
import android.view.View;
import android.view.Window;
import android.widget.TextView;

public class MainActivity extends Activity {

    TextView firstTextView;
    TextView secondTextView;

    // Context Menu of firstTextView
    final int MENU_COLORS = 1;
    final int MENU_SIZES = 2;

    final int COLOR_RED = 3;
    final int COLOR_GREEN = 4;
    final int COLOR_BLUE = 5;

    final int SIZE_24 = 6;
    final int SIZE_26 = 7;
    final int SIZE_28 = 8;
    final int SIZE_30 = 9;

    // Context Menu of secondTextView
    final int TEXT_1 = 10;
    final int TEXT_2 = 11;
    final int TEXT_3 = 12;

    @Override
    protected void onCreate(Bundle savedInstanceState) {
        super.onCreate(savedInstanceState);
        this.requestWindowFeature(Window.FEATURE_NO_TITLE);
        setContentView(R.layout.activity_main);

        // Find the interface elements of interest
        firstTextView = findViewById(R.id.firstTextView);
        secondTextView = findViewById(R.id.secondTextView);

        // Register them for the context menu
        registerForContextMenu(firstTextView);
        registerForContextMenu(secondTextView);
    }

    // We override the method of creating a context menu
    @Override
    public void onCreateContextMenu(ContextMenu menu, View v, ContextMenu.ContextMenuInfo menuInfo)
    {
        // Depending on what element of the interface was selected, we need to create a context menu
        switch (v.getId()) {
            case R.id.firstTextView:
                SubMenu colorsSubMenu = menu.addSubMenu(0, MENU_COLORS, 0, "Colors");
                colorsSubMenu.add(0, COLOR_RED, 0, "Red");
                colorsSubMenu.add(0, COLOR_GREEN, 0, "Green");
                colorsSubMenu.add(0, COLOR_BLUE, 0, "Blue");
                SubMenu sizesSubMenu = menu.addSubMenu(1, MENU_SIZES, 0, "Sizes");
                sizesSubMenu.add(1, SIZE_24, 0, "24");
                sizesSubMenu.add(1, SIZE_26, 0, "26");
                sizesSubMenu.add(1, SIZE_28, 0, "28");
                sizesSubMenu.add(1, SIZE_30, 0, "30");
                break;
            case R.id.secondTextView:
                menu.add(0, TEXT_1, 0, "Text 1");
                menu.add(0, TEXT_2, 0, "Text 2");
                menu.add(0, TEXT_3, 0, "Text 3");
                break;
        }
    }

    // Override the method of clicks on the context menu
    @Override
    public boolean onContextItemSelected(MenuItem item)
    {
        //
        switch (item.getItemId())
        {
            // Processing the menu items of the first context menu
            case COLOR_RED:
                firstTextView.setTextColor(Color.RED);
                firstTextView.setText("Red color is setted");
                break;
            case COLOR_GREEN:
                firstTextView.setTextColor(Color.GREEN);
                firstTextView.setText("Green color is setted");
                break;
            case COLOR_BLUE:
                firstTextView.setTextColor(Color.BLUE);
                firstTextView.setText("Blue color is setted");
                break;
            case SIZE_24:
                firstTextView.setTextSize(24);
                firstTextView.setText("Size 24 is setted");
                break;
            case SIZE_26:
                firstTextView.setTextSize(26);
                firstTextView.setText("Size 26 is setted");
                break;
            case SIZE_28:
                firstTextView.setTextSize(28);
                firstTextView.setText("Size 28 is setted");
                break;
            case SIZE_30:
                firstTextView.setTextSize(30);
                firstTextView.setText("Size 30 is setted");
                break;
            // Processing the menu items of the second context menu
            case TEXT_1:
                secondTextView.setText("Text 1");
                break;
            case TEXT_2:
                secondTextView.setText("Text 2");
                break;
            case TEXT_3:
                secondTextView.setText("Text 3");
                break;
        }
        return super.onContextItemSelected(item);
    }
}
Implementation in QML
But the layout and processing of context menu events in QML will be implemented in one main.qml file
main.qml
In this case, for each text field, its own context menu object will be created. Right in these text fields and place this context menu. To create a menu, you need the appropriate type of QML Menu.
The menu is formed by a tree structure of objects:
- Menu - if you want to create a submenu
- Action - actions that have a triggered signal and an onTriggered handler, by the way, when developing under Desktop, these combinations can be hung with hotkey combinations.
In this case, you do not need to assign different id for the menu items, because each Action has its own handler, just assign each one its own logic of behavior. The properties of text fields are accessed via their id:
- firstTextView
- secondTextView
import QtQuick 2.10
import QtQuick.Window 2.10
import QtQuick.Controls 2.3

ApplicationWindow {
    visible: true
    width: 360
    height: 520
    title: qsTr("QML Context Menu")

    Text {
        id: firstTextView
        font.pixelSize: 24
        text: qsTr("Use context menu to change my color and size")
        wrapMode: Text.Wrap

        anchors {
            top: parent.top
            topMargin: 24
            left: parent.left
            right: parent.right
        }

        // The click area is placed on the entire Text element to bring up the context menu
        MouseArea {
            anchors.fill: parent
            onPressAndHold: firstContextMenu.open()
        }

        Menu {
            id: firstContextMenu
            Menu {
                title: qsTr("Colors")
                Action {
                    text: qsTr("Red")
                    onTriggered: {
                        firstTextView.color = "red"
                        firstTextView.text = qsTr("Red color is setted")
                    }
                }
                Action {
                    text: qsTr("Green")
                    onTriggered: {
                        firstTextView.color = "green"
                        firstTextView.text = qsTr("Green color is setted")
                    }
                }
                Action {
                    text: qsTr("Blue")
                    onTriggered: {
                        firstTextView.color = "blue"
                        firstTextView.text = qsTr("Blue color is setted")
                    }
                }
            }
            Menu {
                title: qsTr("Sizes")
                Action {
                    text: qsTr("24")
                    onTriggered: {
                        firstTextView.font.pixelSize = 24
                        firstTextView.text = qsTr("Size 24 is setted")
                    }
                }
                Action {
                    text: qsTr("26")
                    onTriggered: {
                        firstTextView.font.pixelSize = 26
                        firstTextView.text = qsTr("Size 26 is setted")
                    }
                }
                Action {
                    text: qsTr("28")
                    onTriggered: {
                        firstTextView.font.pixelSize = 28
                        firstTextView.text = qsTr("Size 28 is setted")
                    }
                }
                Action {
                    text: qsTr("30")
                    onTriggered: {
                        firstTextView.font.pixelSize = 30
                        firstTextView.text = qsTr("Size 30 is setted")
                    }
                }
            }
        }
    }

    Text {
        id: secondTextView
        font.pixelSize: 24
        text: qsTr("Use context menu to set text")
        anchors.centerIn: parent

        // The click area is placed on the entire Text element to bring up the context menu
        MouseArea {
            anchors.fill: parent
            onPressAndHold: secondContextMenu.open()
        }

        Menu {
            id: secondContextMenu
            title: qsTr("Texts")
            Action {
                text: qsTr("Text 1")
                onTriggered: secondTextView.text = text
            }
            Action {
                text: qsTr("Text 2")
                onTriggered: secondTextView.text = text
            }
            Action {
                text: qsTr("Text 3")
                onTriggered: secondTextView.text = text
            }
        }
    }
}
