- 1. Creating a project in Java
- 2. Creating a Project in Qt QML
- 1. Step 1 - Let's create an empty Qt Quick application
- 2. Step 2 - Choose the location of the project
- 3. Step 3 - Select the build system
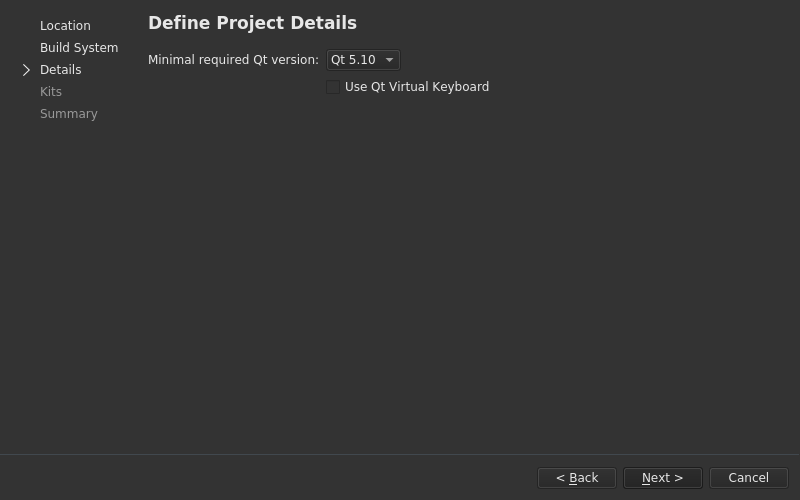
- 4. Step 4 - Select the Qt library version
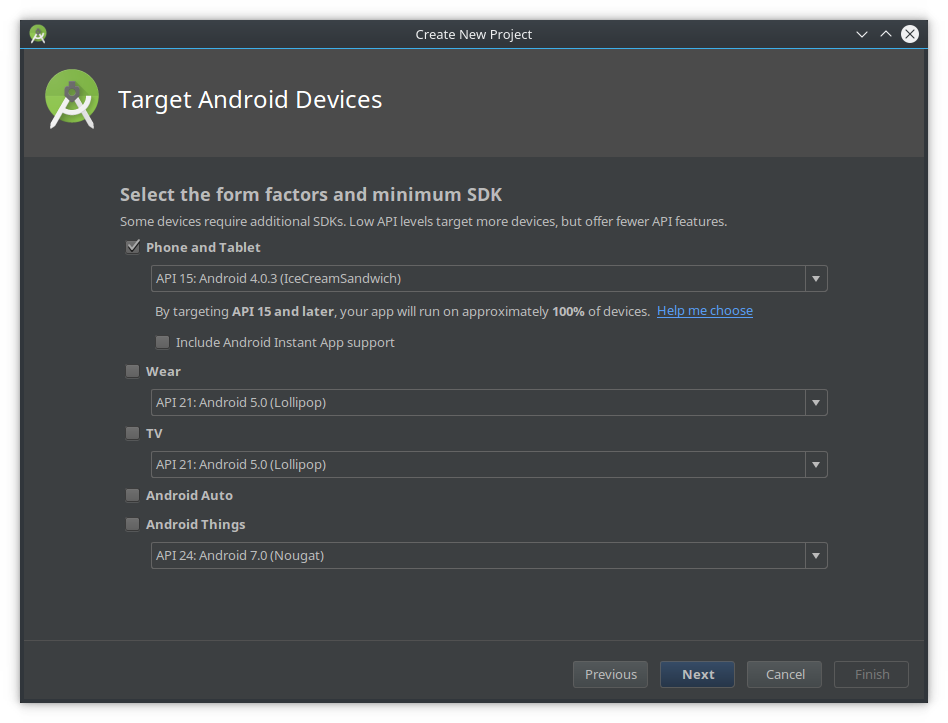
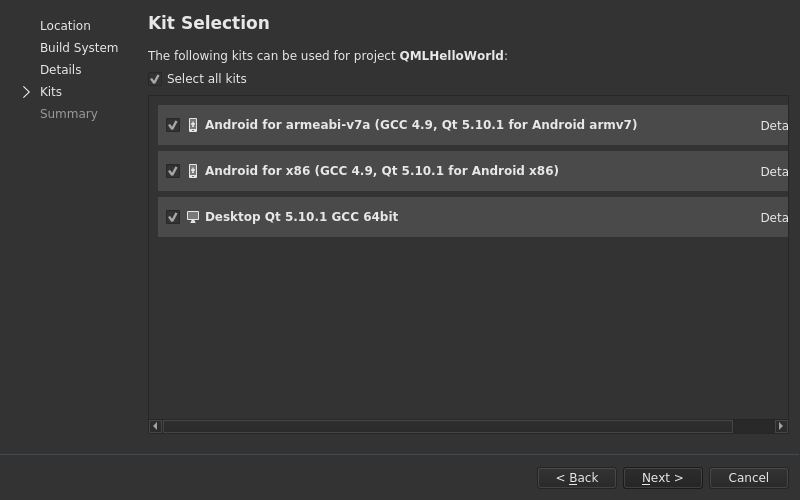
- 5. Step 5 - Select the assembly kit
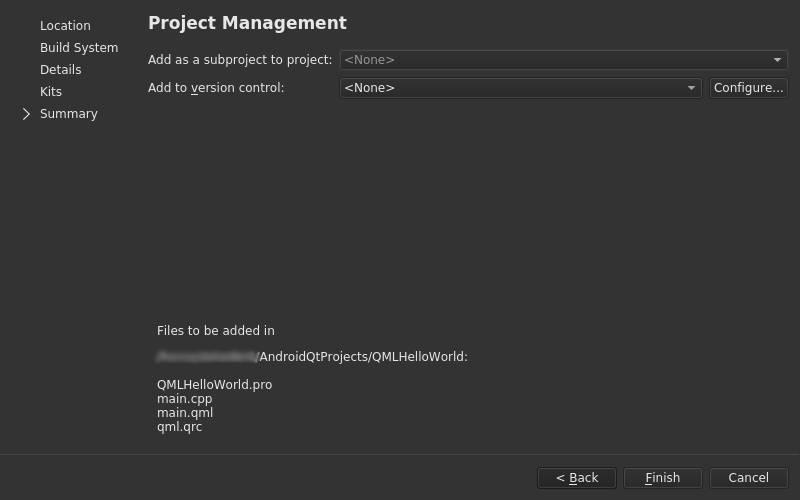
- 6. Step 6 - Select a version control system
- 7. Software code
- 8. Build and AndroidManifest.xml
- 3. Conclusion
Curiosity sake decided to compare the two options for writing applications for Android. Once upon a time, I began to work on programming for Android on Java, but over time I switched to developing Desktop applications on Qt QML. But now again decided to refresh some aspects of memory to make sure that Qt QML I like more.
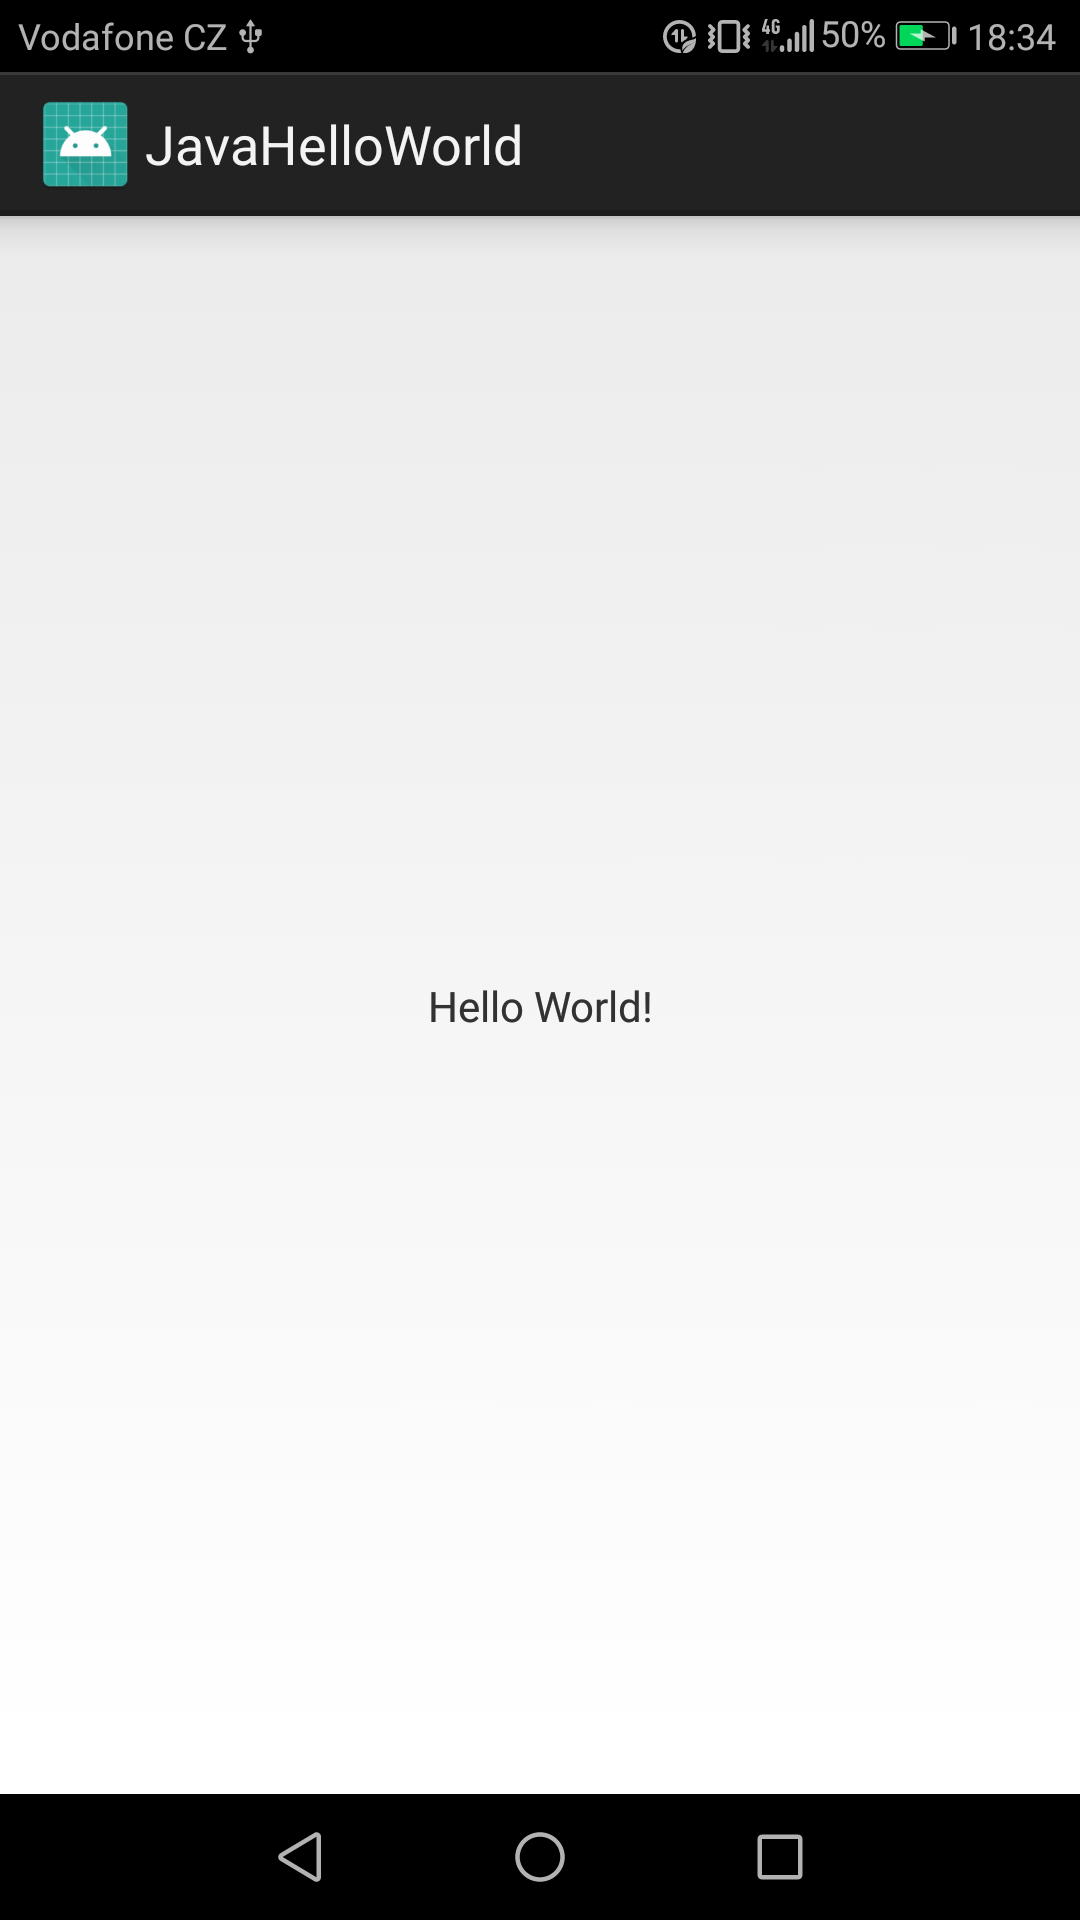
Immediately give the result of two Hello worlds. They certainly will not be 100 percent identical, but should be similar. As a basic example, take an empty Activity, which is created in Android Studio.
The first sample is Hello World in Java
The second sample is Hello World on Qt QML
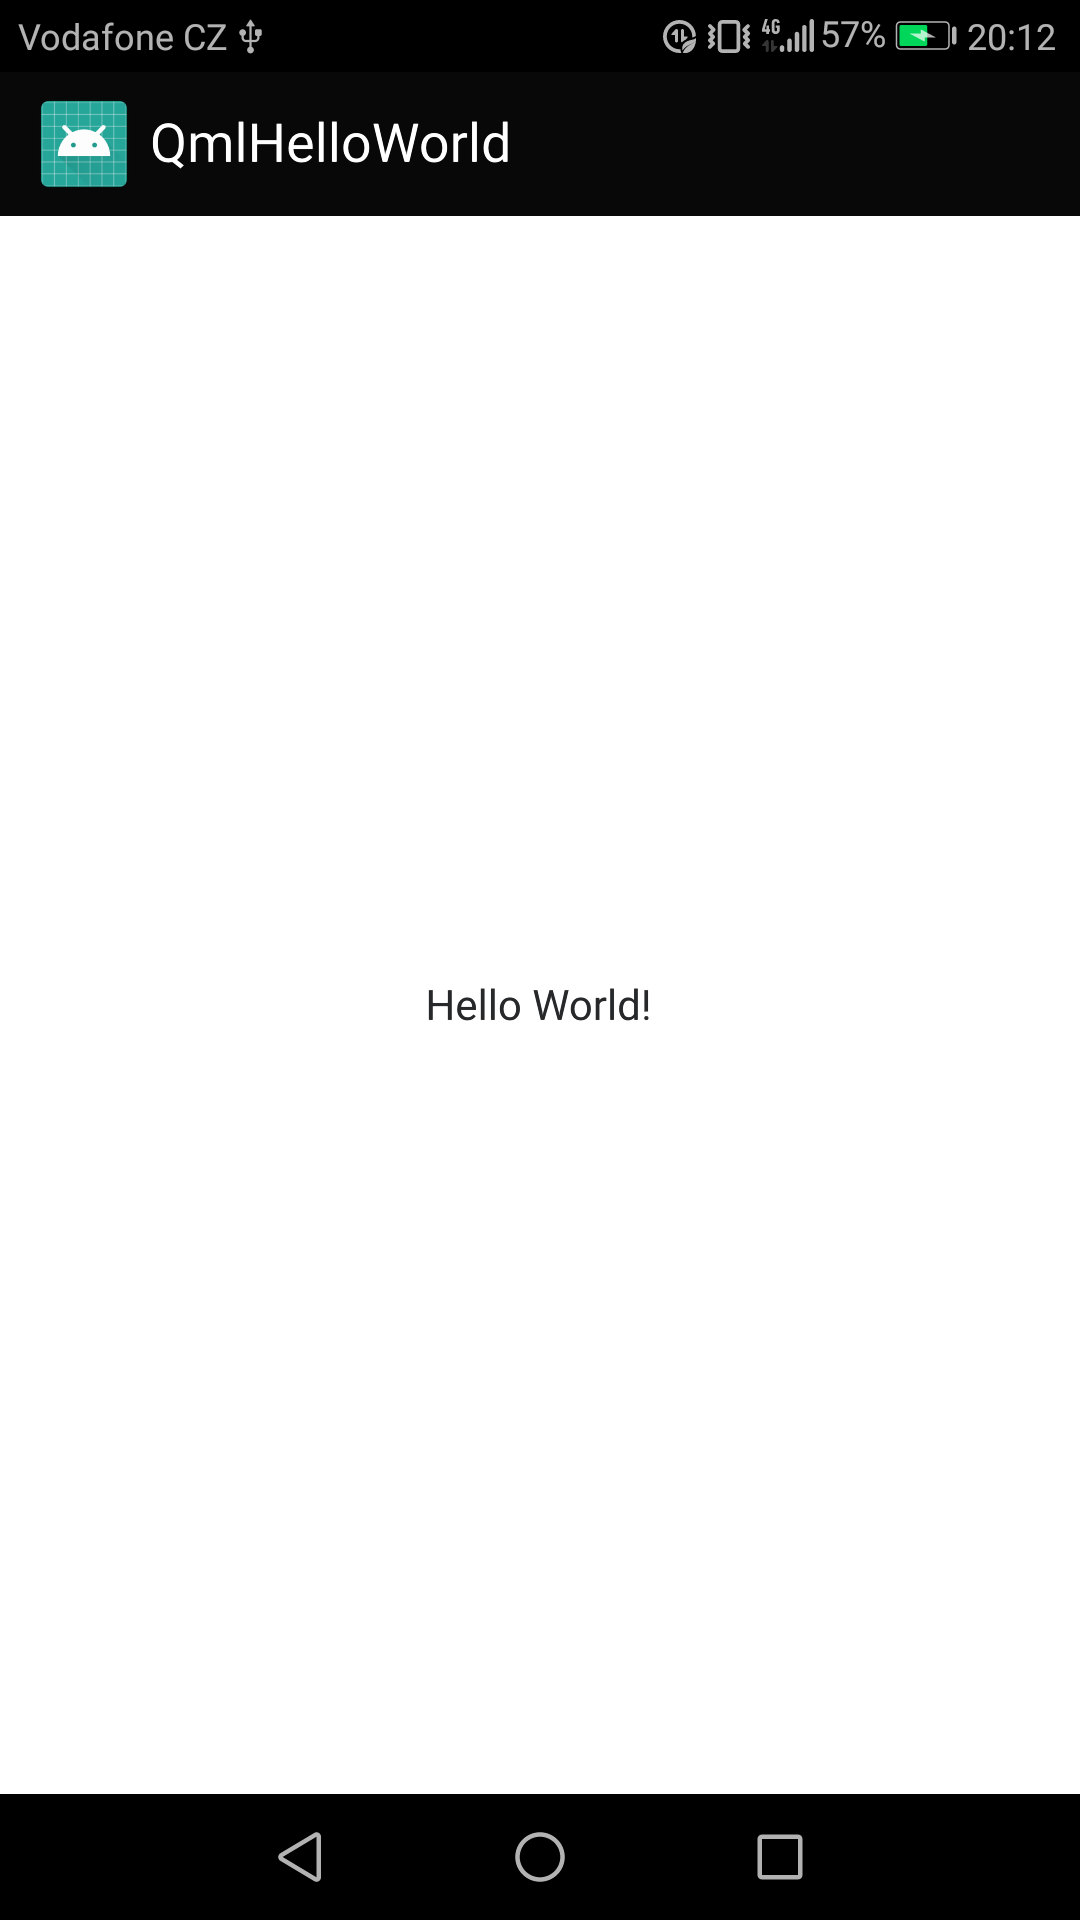
In general, applications are similar, the appearance differs slightly in the rendering of text, and in additional effects. In all other respects, the applications are the same.
First, start with the Java application.
Creating a project in Java
Step 1 - Select the point of creating a new project
Step 2 - Name the project

Step 3 - select the minimum project SDK
Step 4 - Select the project type - Empty Activity
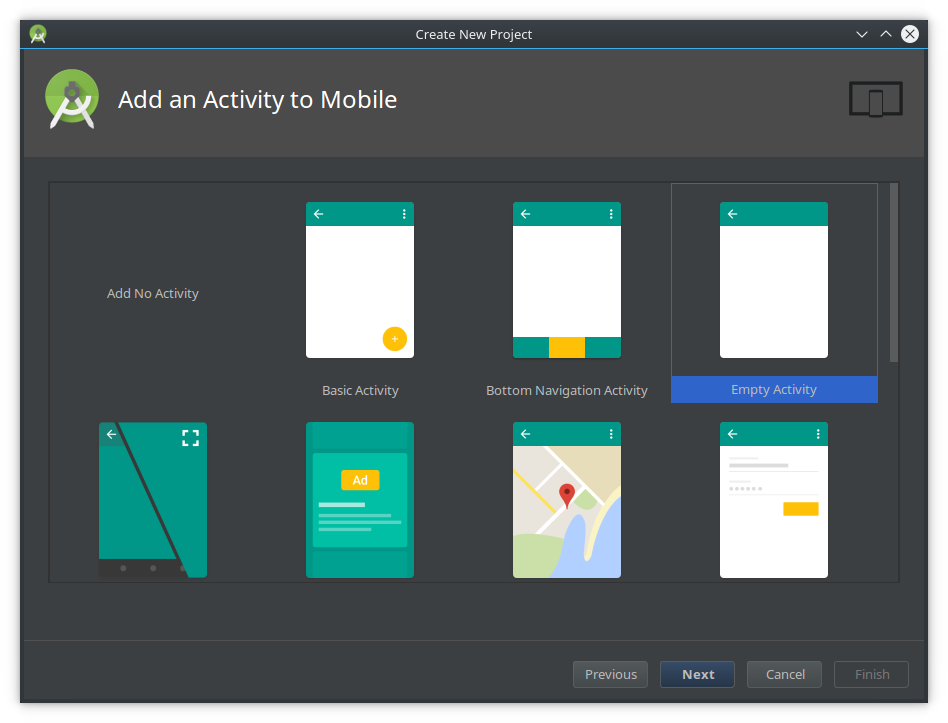
Step 5 - Configure Activity
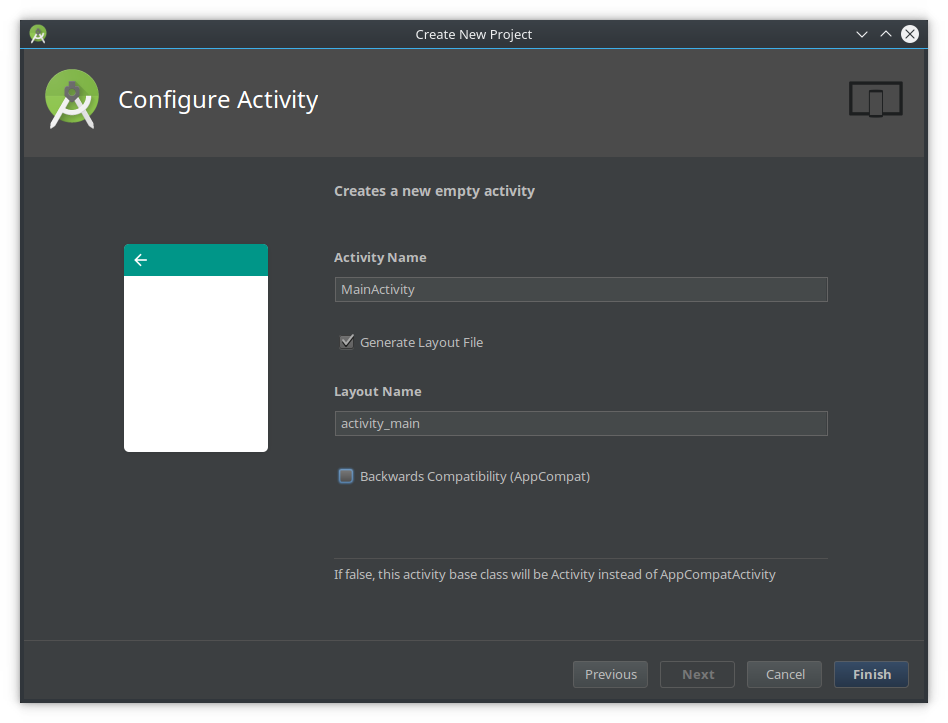
This project will be created and configured. You can immediately assemble it and run it on your smartphone. I have the size apk, compiled in debug mode, made an example of 170 KB.
Software code
And now let's look at what the application code looks like.
Applications for Android in Java consist of two software layers:
-
XML-layout of the application, which is the interface of the application, its appearance. And actually having no program logic.
Java-logic application, which is responsible for all business logic, etc. etc.
XML-layout
To be honest ... the layout of all properties of the appearance of the application in XML looks rather cumbersome, given that it is not possible to use any program logic to change the properties or text of the elements. This complexity will be especially obvious when it is necessary to describe rather complex interfaces.
But let's look at the xml-code.
<?xml version="1.0" encoding="utf-8"?>
<android.support.constraint.ConstraintLayout xmlns:android="http://schemas.android.com/apk/res/android"
    xmlns:app="http://schemas.android.com/apk/res-auto"
    xmlns:tools="http://schemas.android.com/tools"
    android:layout_width="match_parent"
    android:layout_height="match_parent"
    tools:context="com.evileg.javahelloworld.MainActivity">

    <TextView
        android:layout_width="wrap_content"
        android:layout_height="wrap_content"
        android:text="Hello World!"
        app:layout_constraintBottom_toBottomOf="parent"
        app:layout_constraintLeft_toLeftOf="parent"
        app:layout_constraintRight_toRightOf="parent"
        app:layout_constraintTop_toTopOf="parent" />

</android.support.constraint.ConstraintLayout>
Here you can see that the field with the text Hello World is described, but does not describe the appearance of the ToolBar, which is present in the activation. The presence of ToolBar is determined through the activation context, which is used in this case.
But in QML, unfortunately, you will have to write the same ToolBar yourself.
Java code
The Java code itself will be small, because it will only need to override the method of creating the Activity, in order to install XML in it. And what kind of Activation to start, we define in AndroidManifest.xml.
package com.evileg.javahelloworld;

import android.app.Activity;
import android.os.Bundle;

public class MainActivity extends Activity {

    @Override
    protected void onCreate(Bundle savedInstanceState) {
        super.onCreate(savedInstanceState);
        setContentView(R.layout.activity_main);
    }
}
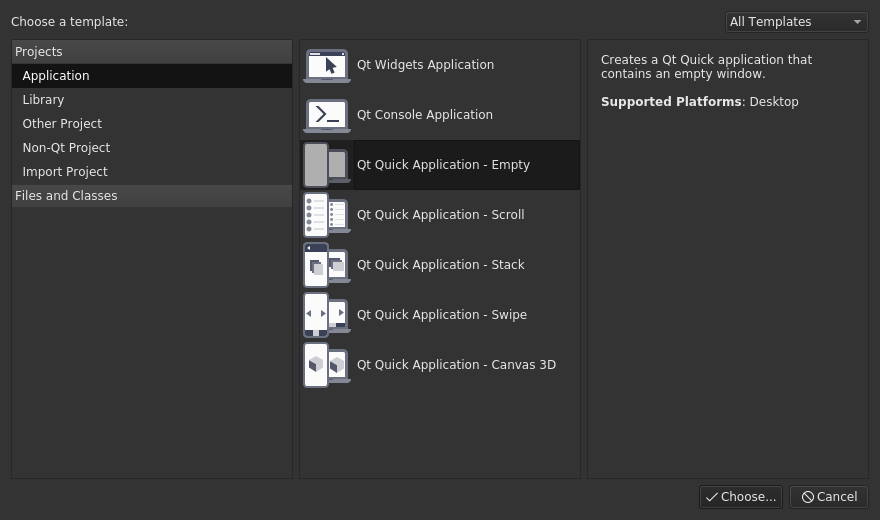
Creating a Project in Qt QML
Step 1 - Let's create an empty Qt Quick application
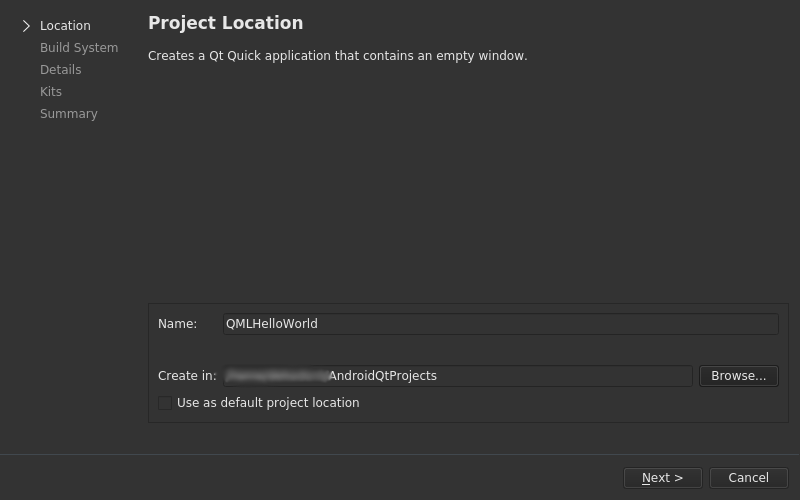
Step 2 - Choose the location of the project
Step 3 - Select the build system
You can choose to taste:
- qmake
- cmake
- qbs
Do not know what to choose, choose qmake

Step 4 - Select the Qt library version
Choose the last stable version (it should be installed)
Step 5 - Select the assembly kit
That's what I like about Qt, so it's because applications on QML can be built for both Desktop and Android devices. That is, if you do not test platform-independent functionality, then you can safely collect under the desktop and conduct all testing on your PC and only periodically check how the application works on the Android device.
Step 6 - Select a version control system
For Hello World, we do not need a version control system.
Software code
Projects on Qt QML generally consist of two software layers, as in the case of Java.
-
C ++ layer - it can be written basic business logic, complex calculations, work with the network, etc.
QML layer - it implements the appearance of the application, as well as some logic, but nothing prevents you from implementing all business logic in QML, if the application and capabilities will be enabled. Also, QML supports JavaScript quite well, on which this logic will be implemented.
That is, in some cases, nothing prevents you from using C ++ at all.
main.cpp
This file is created by default. In this case, we start the QML engine and draw the contents of the main.qml file.
#include <QGuiApplication>
#include <QQmlApplicationEngine>

int main(int argc, char *argv[])
{
    QCoreApplication::setAttribute(Qt::AA_EnableHighDpiScaling);

    QGuiApplication app(argc, argv);

    QQmlApplicationEngine engine;
    engine.load(QUrl(QStringLiteral("qrc:/main.qml")));
    if (engine.rootObjects().isEmpty())
        return -1;

    return app.exec();
}
QMLHelloWorld.pro
Project file Qt, it prescribes all resources, as well as the source files of the project with the build settings. It is also needed here in addition to the AndroidManifest.xml file
QT += quick
CONFIG += c++11

# The following define makes your compiler emit warnings if you use
# any feature of Qt which as been marked deprecated (the exact warnings
# depend on your compiler). Please consult the documentation of the
# deprecated API in order to know how to port your code away from it.
DEFINES += QT_DEPRECATED_WARNINGS

# You can also make your code fail to compile if you use deprecated APIs.
# In order to do so, uncomment the following line.
# You can also select to disable deprecated APIs only up to a certain version of Qt.
#DEFINES += QT_DISABLE_DEPRECATED_BEFORE=0x060000    # disables all the APIs deprecated before Qt 6.0.0

SOURCES += main.cpp

RESOURCES += qml.qrc \
    images.qrc

# Additional import path used to resolve QML modules in Qt Creator's code model
QML_IMPORT_PATH =

# Additional import path used to resolve QML modules just for Qt Quick Designer
QML_DESIGNER_IMPORT_PATH =

# Default rules for deployment.
qnx: target.path = /tmp/$${TARGET}/bin
else: unix:!android: target.path = /opt/$${TARGET}/bin
!isEmpty(target.path): INSTALLS += target

DISTFILES += \
    android/AndroidManifest.xml \
    android/gradle/wrapper/gradle-wrapper.jar \
    android/gradlew \
    android/res/values/libs.xml \
    android/build.gradle \
    android/gradle/wrapper/gradle-wrapper.properties \
    android/gradlew.bat

ANDROID_PACKAGE_SOURCE_DIR = $$PWD/android
main.qml
And here is the most interesting. In this file, you will need to create not only the HelloWorld text, but also create a ToolBar with the icon and the program name. I took the icon from the project in Java and added it to the project resources on Qt QML.
import QtQuick 2.10
import QtQuick.Window 2.10
import QtQuick.Layouts 1.3
import QtQuick.Controls 2.3
import QtQuick.Controls.Material 2.1

ApplicationWindow {
    visible: true
    width: 360
    height: 520
    title: qsTr("Hello World")

    header: ToolBar {
        height: 48

        Rectangle {
            anchors.fill: parent
            color: "#080808"

            Image {
                id: ico
                height: 36
                width: 36
                anchors {
                    left: parent.left
                    leftMargin: 10
                    top: parent.top
                    topMargin: 6
                }
                source: "qrc:/images/ic_launcher.png"
            }


            Text {
                anchors {
                    verticalCenter: parent.verticalCenter
                    left: ico.right
                    leftMargin: 4
                }

                text: qsTr("QmlHelloWorld")
                font.pixelSize: 18
                color: "white"
            }
        }
    }

    Label {
        anchors.centerIn: parent
        text: qsTr("Hello World!")
        font.pixelSize: 14
    }
}
The code turned out to be uniquely greater than in the XML layout file for the Java application. But let's figure it out. This is because Qt QML initially does not have any Activation. In general, the entire application works in one single activation, and there is no need to switch between these activations. To make the behavior of the program similar to the change of Activation, you can use the Loader, StackView, SwipeView and many other components. And here the window component is used, which takes place to place ToolBar, you just need to write the layout of this ToolBar
So, if such ToolBar were present initially, then writing the Hello World text would be less cumbersome than in the case of Java. That is, it would be
import QtQuick 2.10
import QtQuick.Window 2.10
import QtQuick.Controls 2.3
import QtQuick.Controls.Material 2.1

ApplicationWindow {
    visible: true
    width: 360
    height: 520

    Label {
        anchors.centerIn: parent
        text: qsTr("Hello World!")
        font.pixelSize: 14
    }
}
Against this in XML
<?xml version="1.0" encoding="utf-8"?>
<android.support.constraint.ConstraintLayout xmlns:android="http://schemas.android.com/apk/res/android"
    xmlns:app="http://schemas.android.com/apk/res-auto"
    xmlns:tools="http://schemas.android.com/tools"
    android:layout_width="match_parent"
    android:layout_height="match_parent"
    tools:context="com.evileg.javahelloworld.MainActivity">

    <TextView
        android:layout_width="wrap_content"
        android:layout_height="wrap_content"
        android:text="Hello World!"
        app:layout_constraintBottom_toBottomOf="parent"
        app:layout_constraintLeft_toLeftOf="parent"
        app:layout_constraintRight_toRightOf="parent"
        app:layout_constraintTop_toTopOf="parent" />

</android.support.constraint.ConstraintLayout>
And honestly, the QML version looks more readable.
Build and AndroidManifest.xml
The build system in both cases was used by Gradle.
As for AndroidManifest.xml, in the case of Java, no additional manipulations were made. While in the case of Qt it was necessary to add startup icons. You can read more about working with AndroidManifest.xml in Qt in this article .
Conclusion
In both cases, you can get two identical applications, but in the nuances of development you can decide what and who will be more convenient.
Both options offer working in two layers
- Java + XML
- QML + C++
But in the case of QML / C ++, all logic can be written only in QML, and in the first case in XML, you can write only the layout.
The original Hello World will be written fairly quickly in Java. It will be enough just to create a project, and to get a similar result on Qt QML, you will have to write a little more code. However, in some cases, you will have to write significantly less code in QML than in Java / XML.
From the minuses of Qt, I would immediately note that there are platform-independent moments that still have to be solved through Java, for example, events from the Android OS. However ... also some problematic parts of the project are solved through C ++, in the project in Java, so there will probably be parity.
Of the pros, Qt would note that in recent versions they support Material Design , which will also facilitate the development of the application, when the designer does not exist as such in the project.
The size of the built APK, here of course Java wins. In debug mode, the output APK with Java came out just 170 kB, whereas the APK from Qt went 10 mb, in the release build the size of the APK Qt would be about 5-6 mb, but I would not call it so critical, because many large applications on Google Play weigh 40-60 mb and as a result the sizes will be equalized.
The remaining aspects will be considered in the following articles.

Разрешите узнать, как вы получили qt+qml приложение размером в 10мб(даже релизных). Дело в том, что пустое приложение, хоть и со стек вью, обходится мне на все 40мб пространства. Или же вы воспользовались ministro? Спасибо за ответ!
Добрый день. На тот момент ничего не использовал дополнительно и никаких специальных настроек не делал. Просто собрал и получилось 10 мб.